Product Catalog Overview
Last updated: August 26, 2026
This page explains how to navigate the product catalog, update product information, and map your products to trading partners and connected third-party integrations.
Related articles:
Overview
To view your products, open Products from the left navigation. Across the top you will see Manage, Add Product, and one or more tabs:
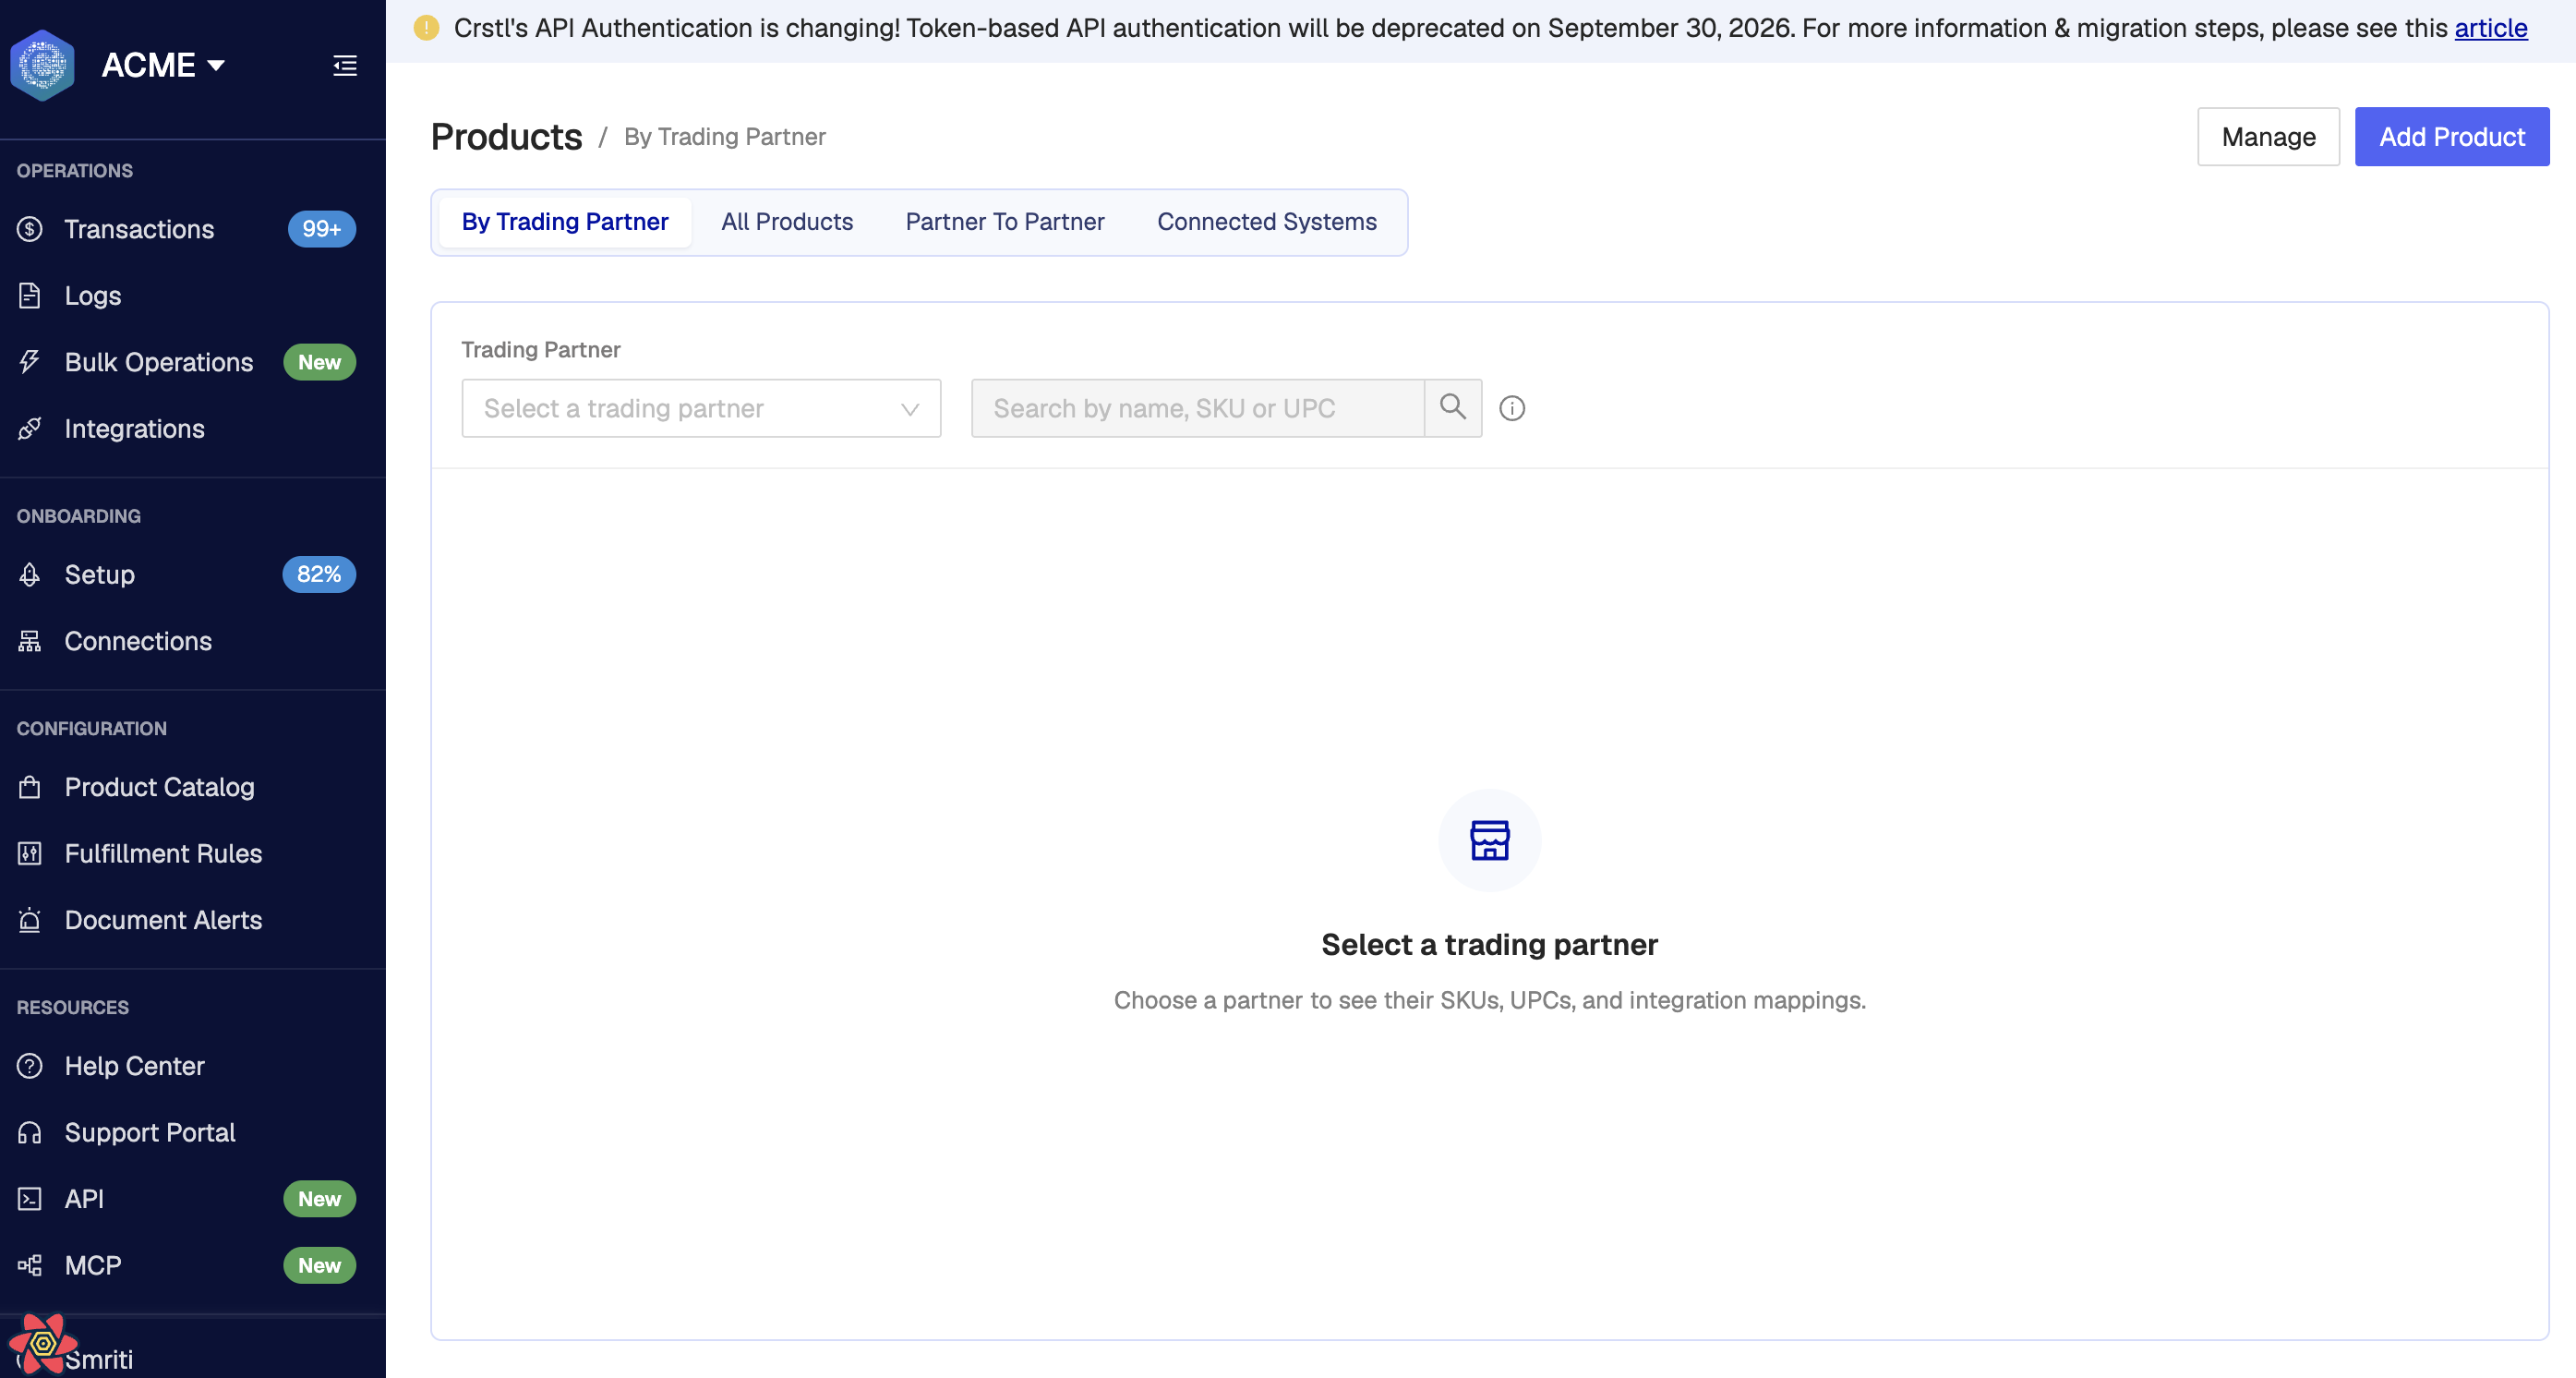
By Trading Partner — Products mapped to one trading partner, with SKUs, UPCs, pack settings, and integration columns for that partner.
All Products — The full catalog of items you have created or imported into Crstl.
Partner To Partner — Shown when EDI based integrations are installed. Use this to see how a product on one trading partner maps through to another.
Connected Systems — Catalogs from your installed integrations (for example Shopify). Use this tab to find an integration item and link it into Crstl.
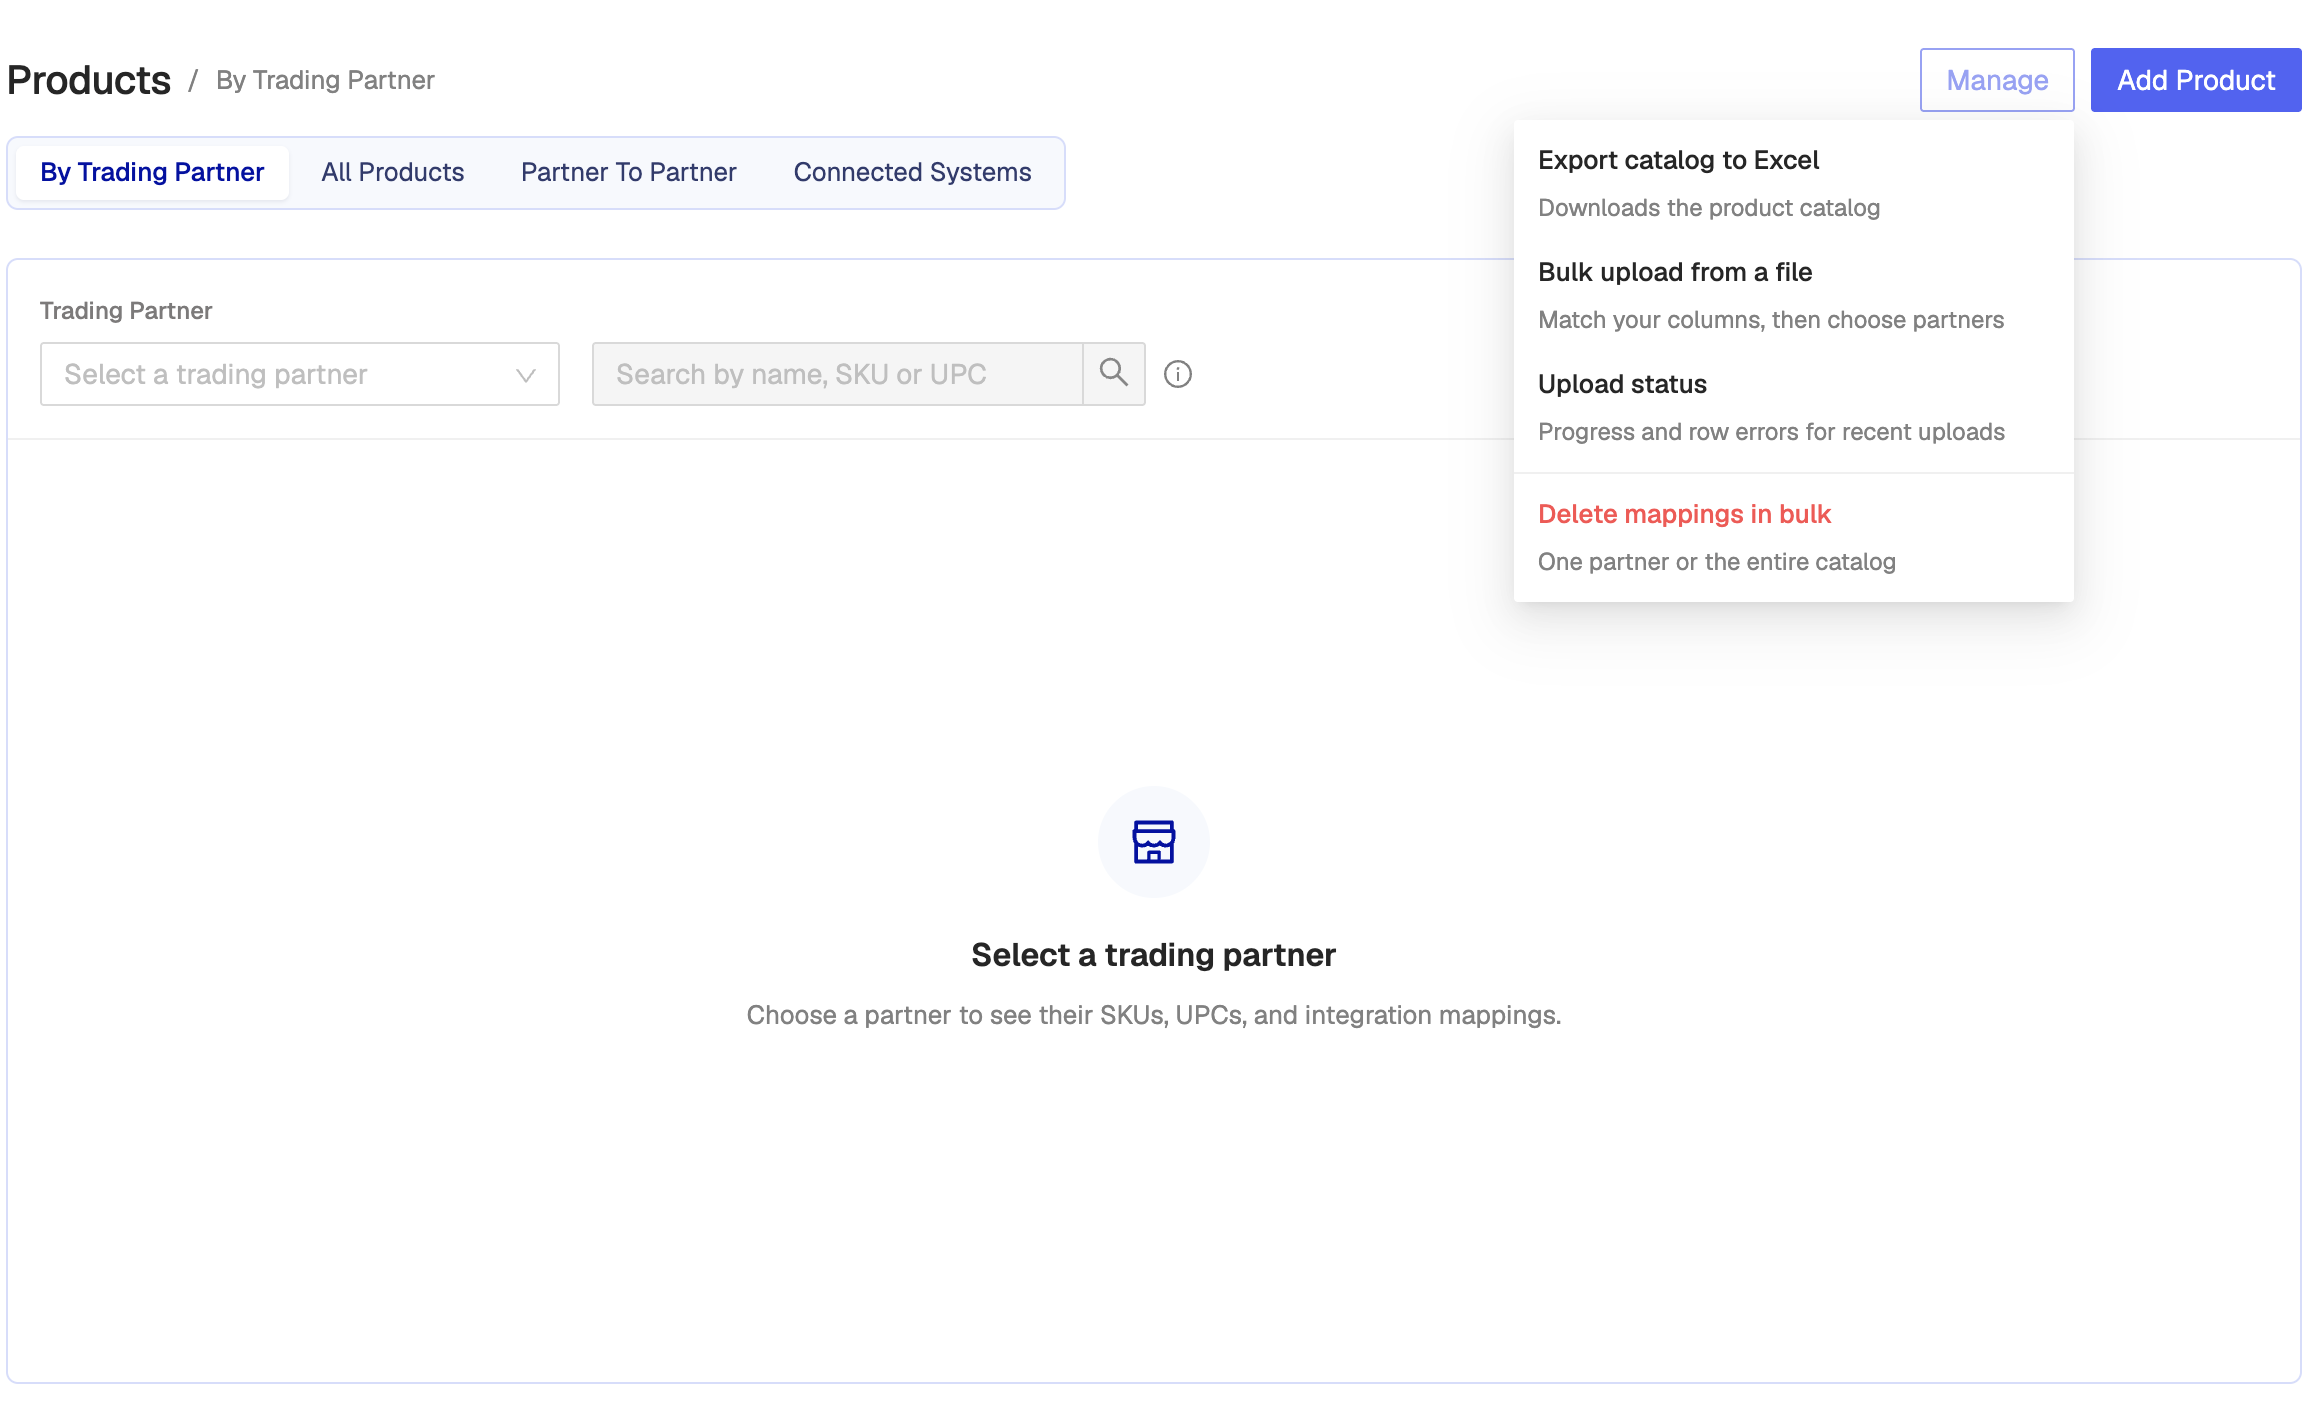
Manage also lets you export the catalog to Excel, check Upload status, or Delete mappings in bulk (one partner or the entire catalog).
All Products
All Products is the full list of catalog items.
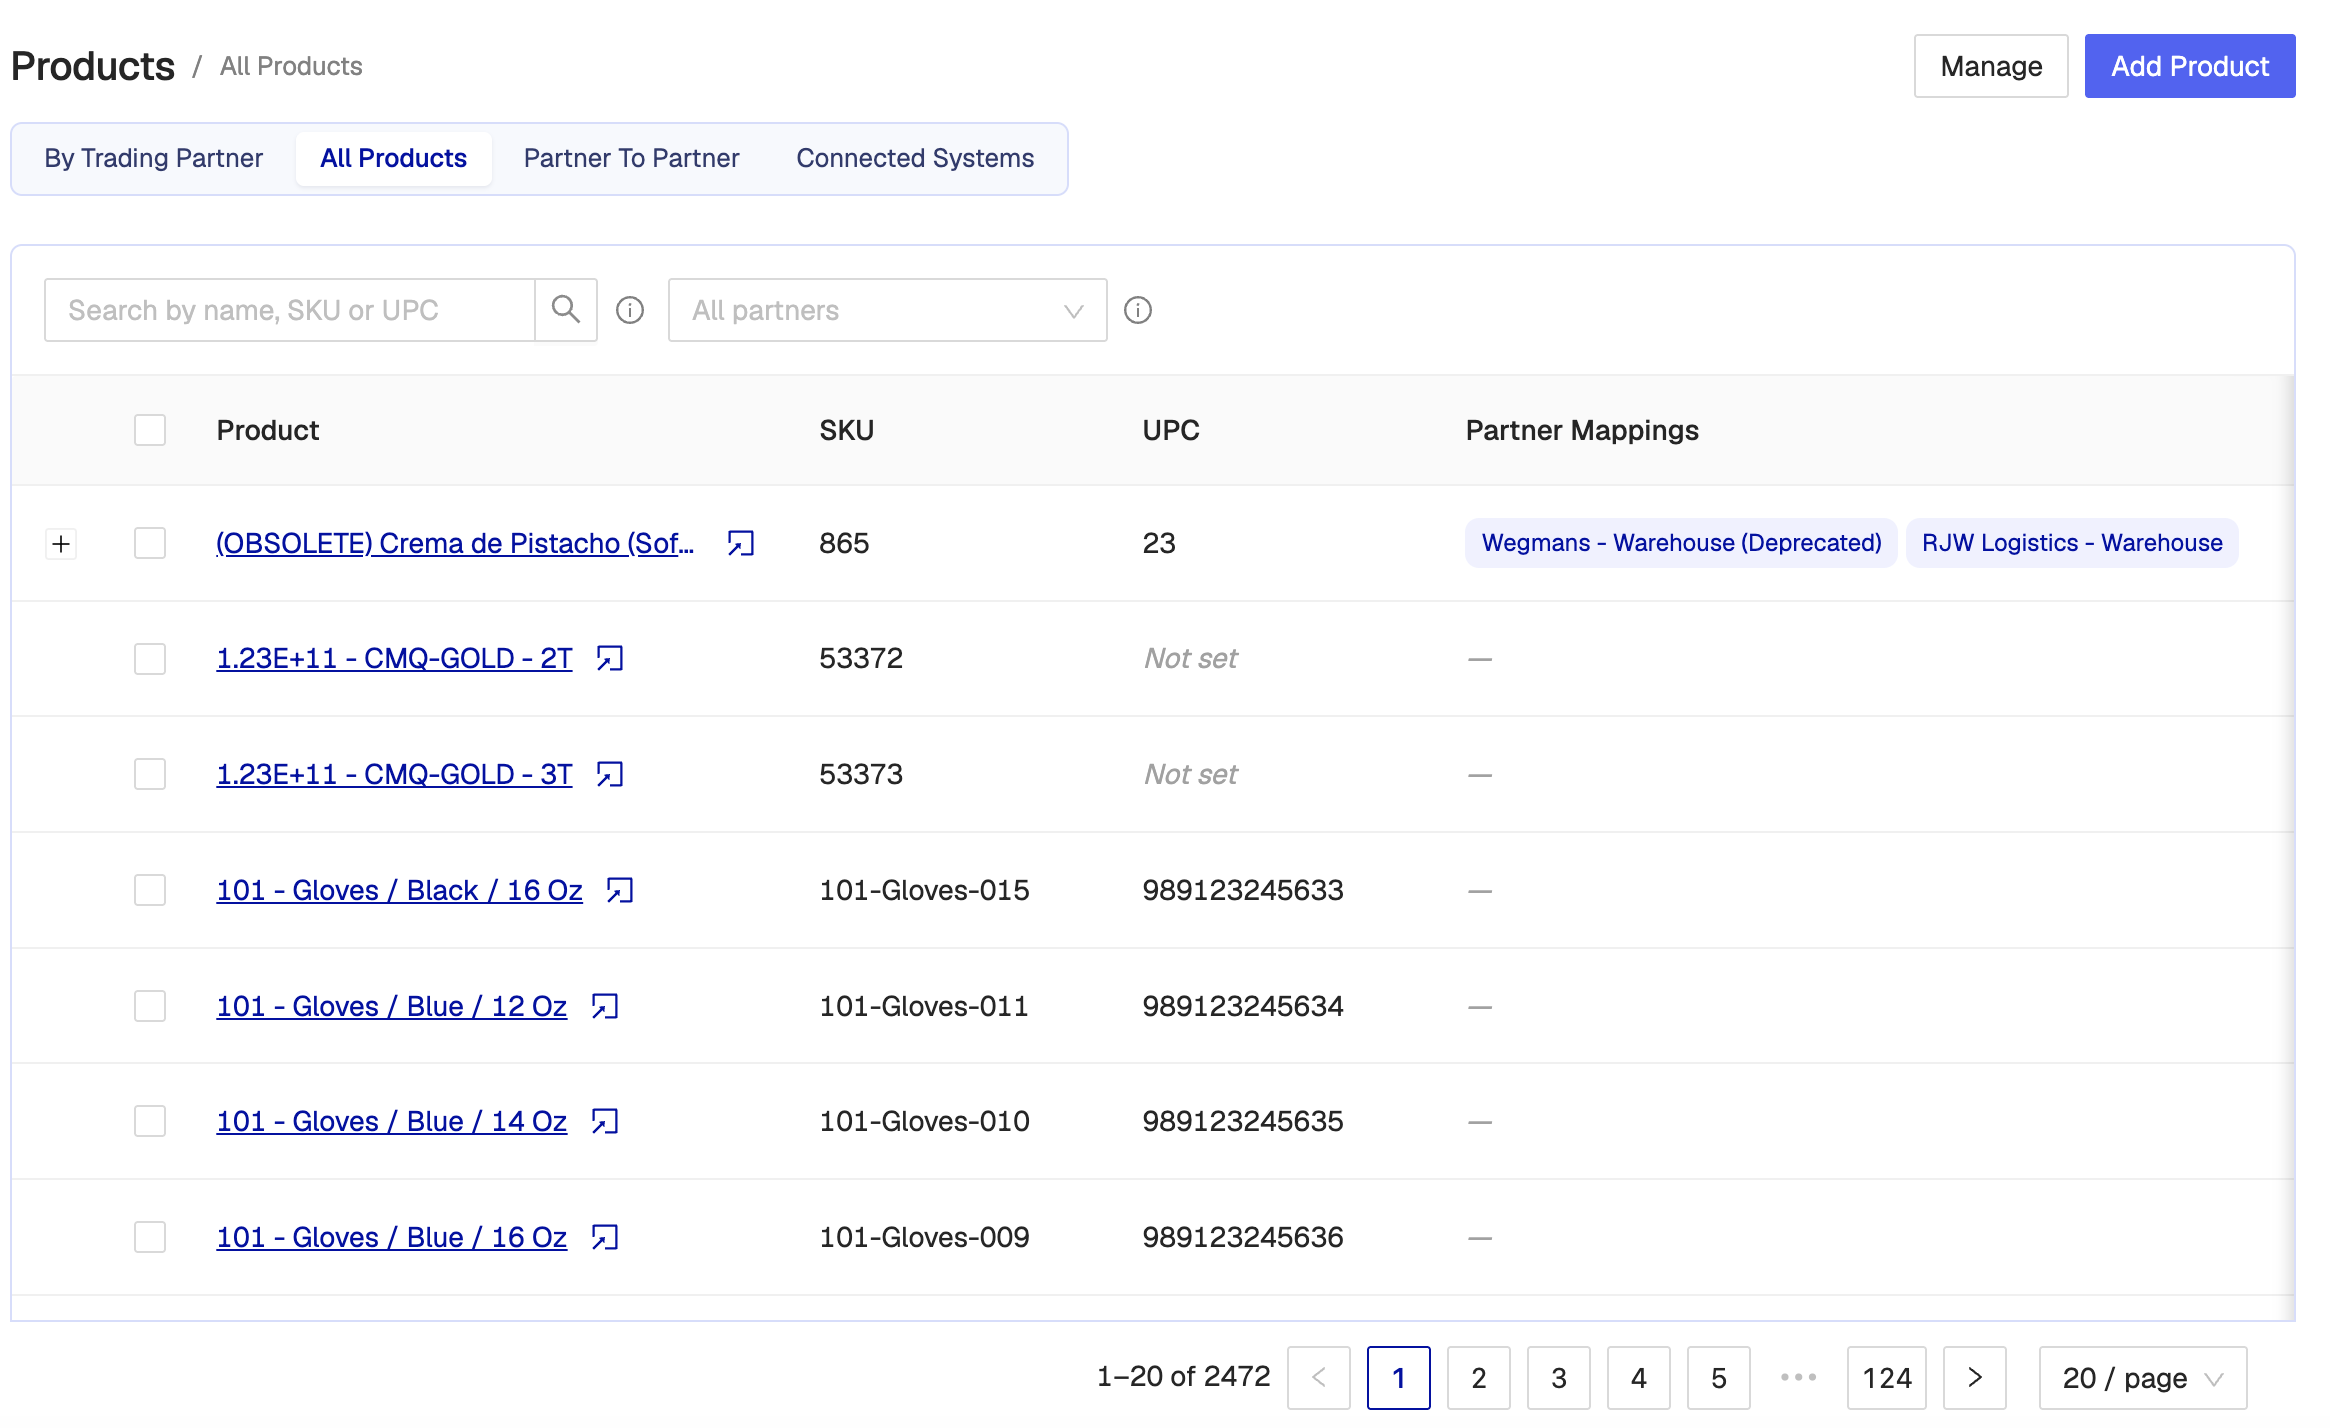
Search by name, SKU, or UPC (including partner-specific identifiers). You can filter to one trading partner. Click a product name to open the product page. Select rows to delete up to 20 products at a time.
By Trading Partner
Use this tab to work in one retailer’s catalog at a time.
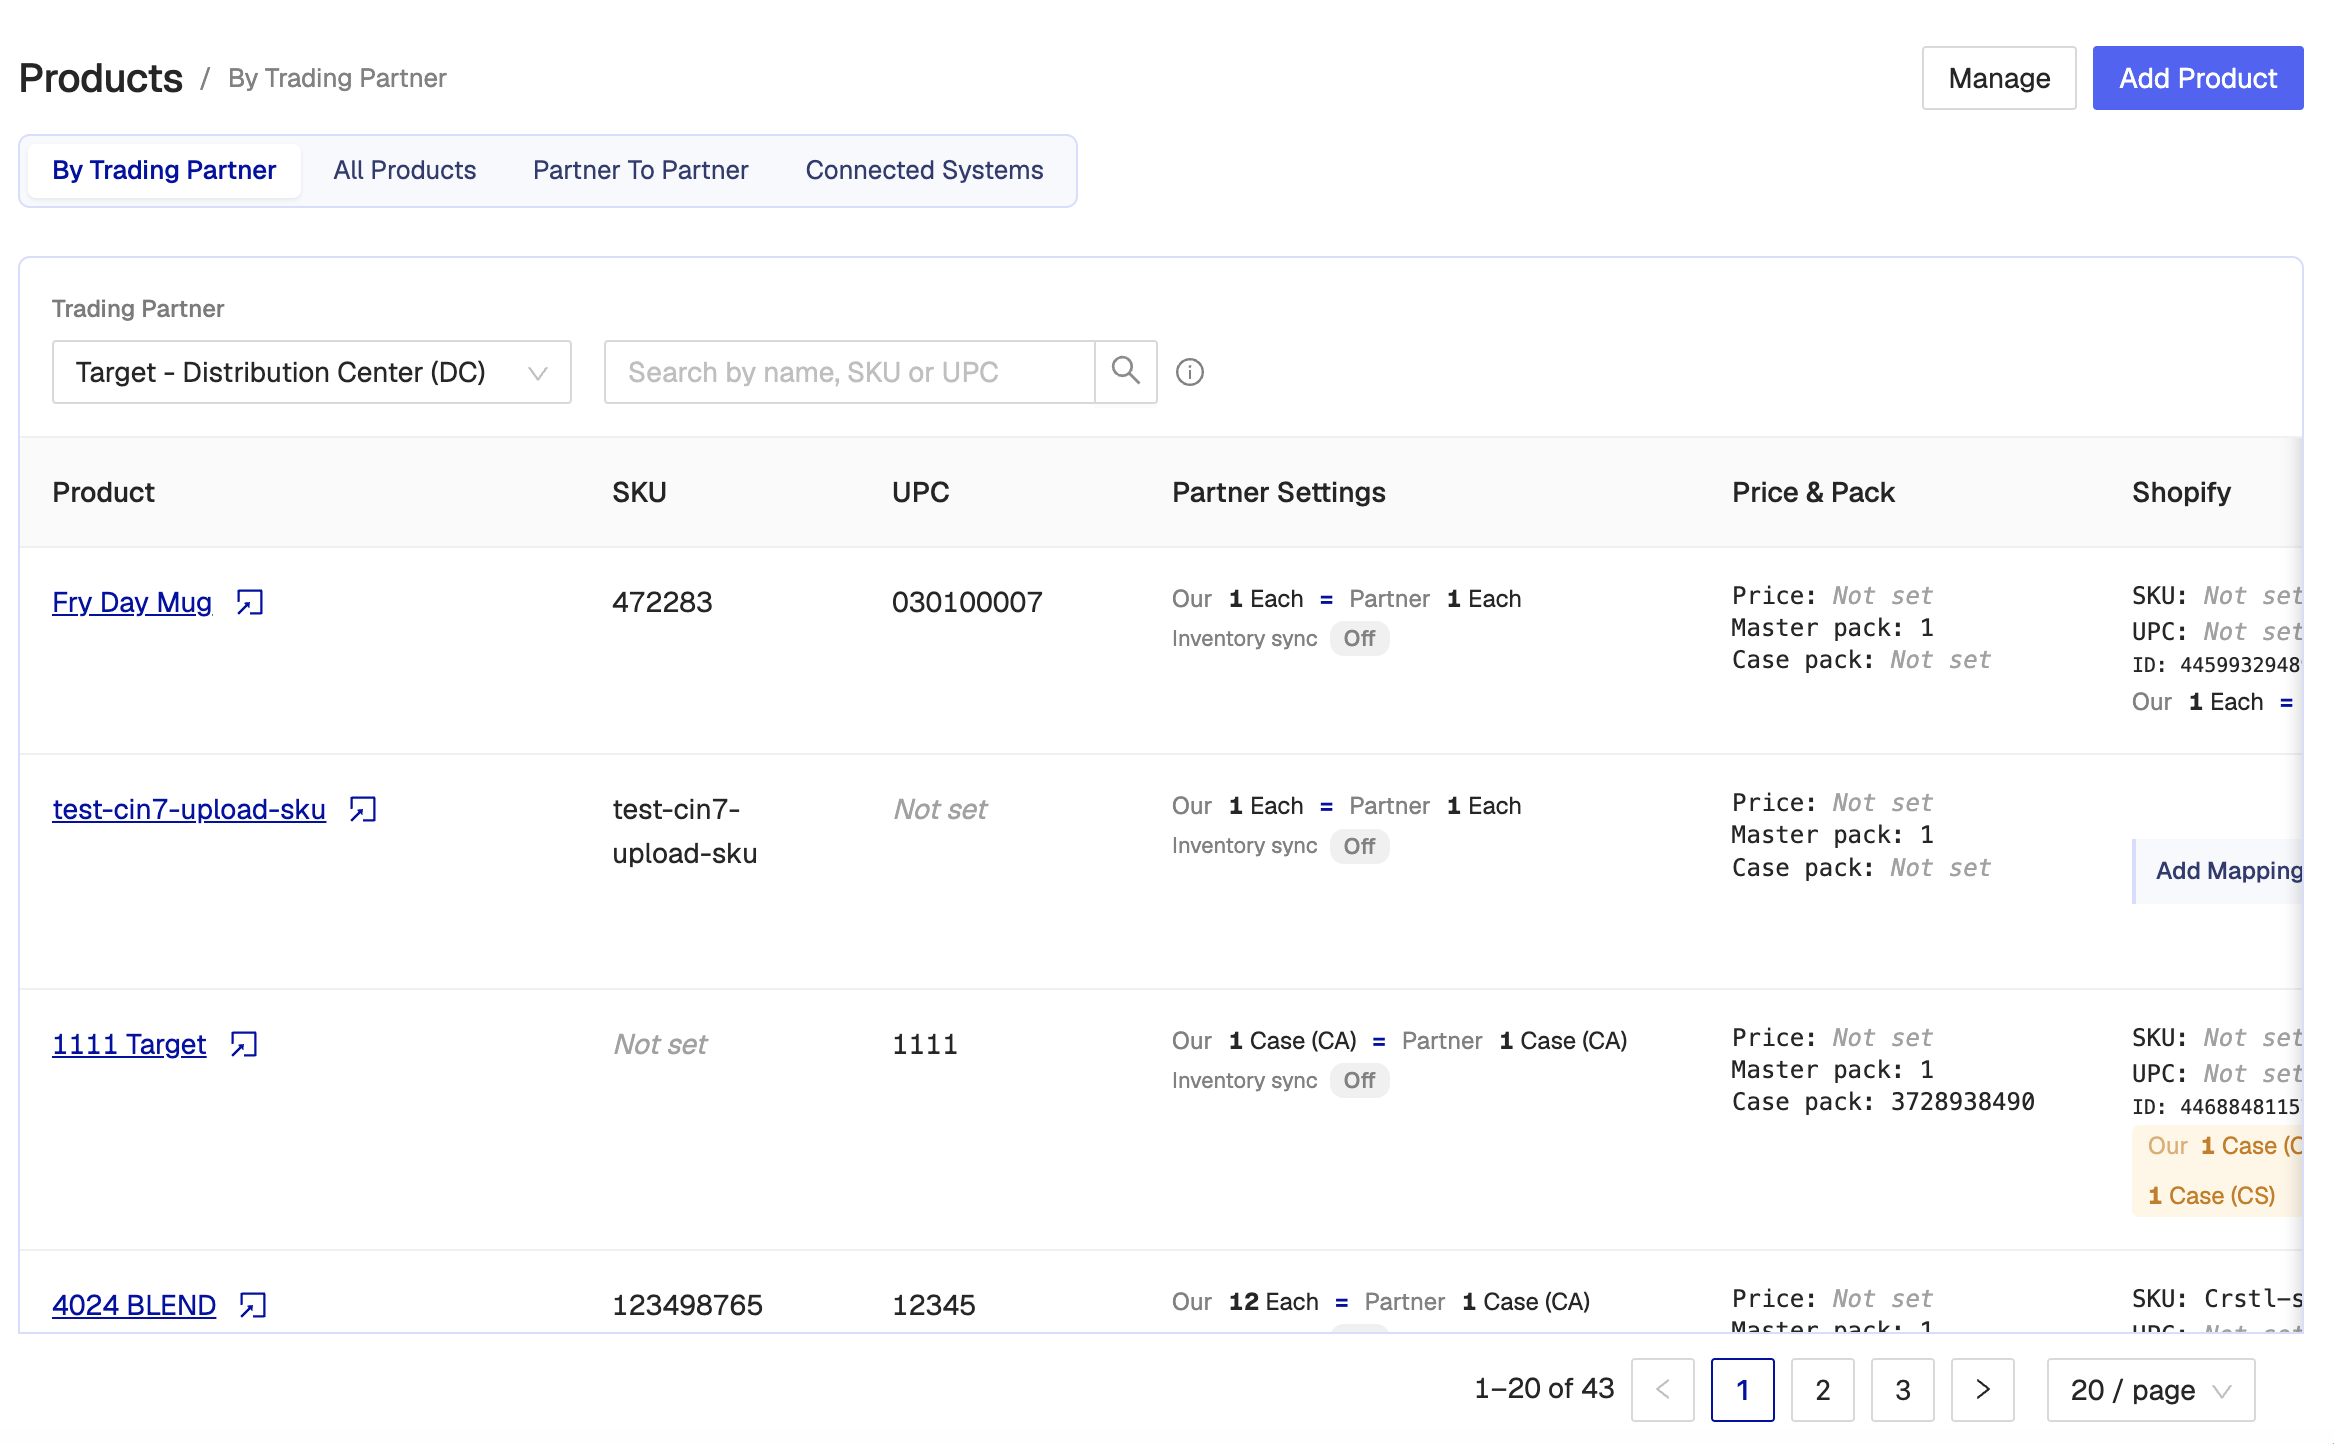
Open Products → By Trading Partner.
Choose a trading partner. The table shows products mapped to that partner, including partner SKU/UPC, units, inventory sync, pack fields, and a column per connected system.
Click a product name to open the product page. Use Add Mapping in an empty integration column to link that system for this partner.
Search filters that partner’s products by name, SKU, or UPC. Changing partner clears search.
If nothing is mapped to that partner yet, the table is empty. Add a partner mapping from the product page, or bulk upload.
Partner To Partner
Use this tab when EDI documents are forwarded from one trading partner to another (for example a retailer PO that must be sent on to a 3PL). This tab only appears if EDI is installed.
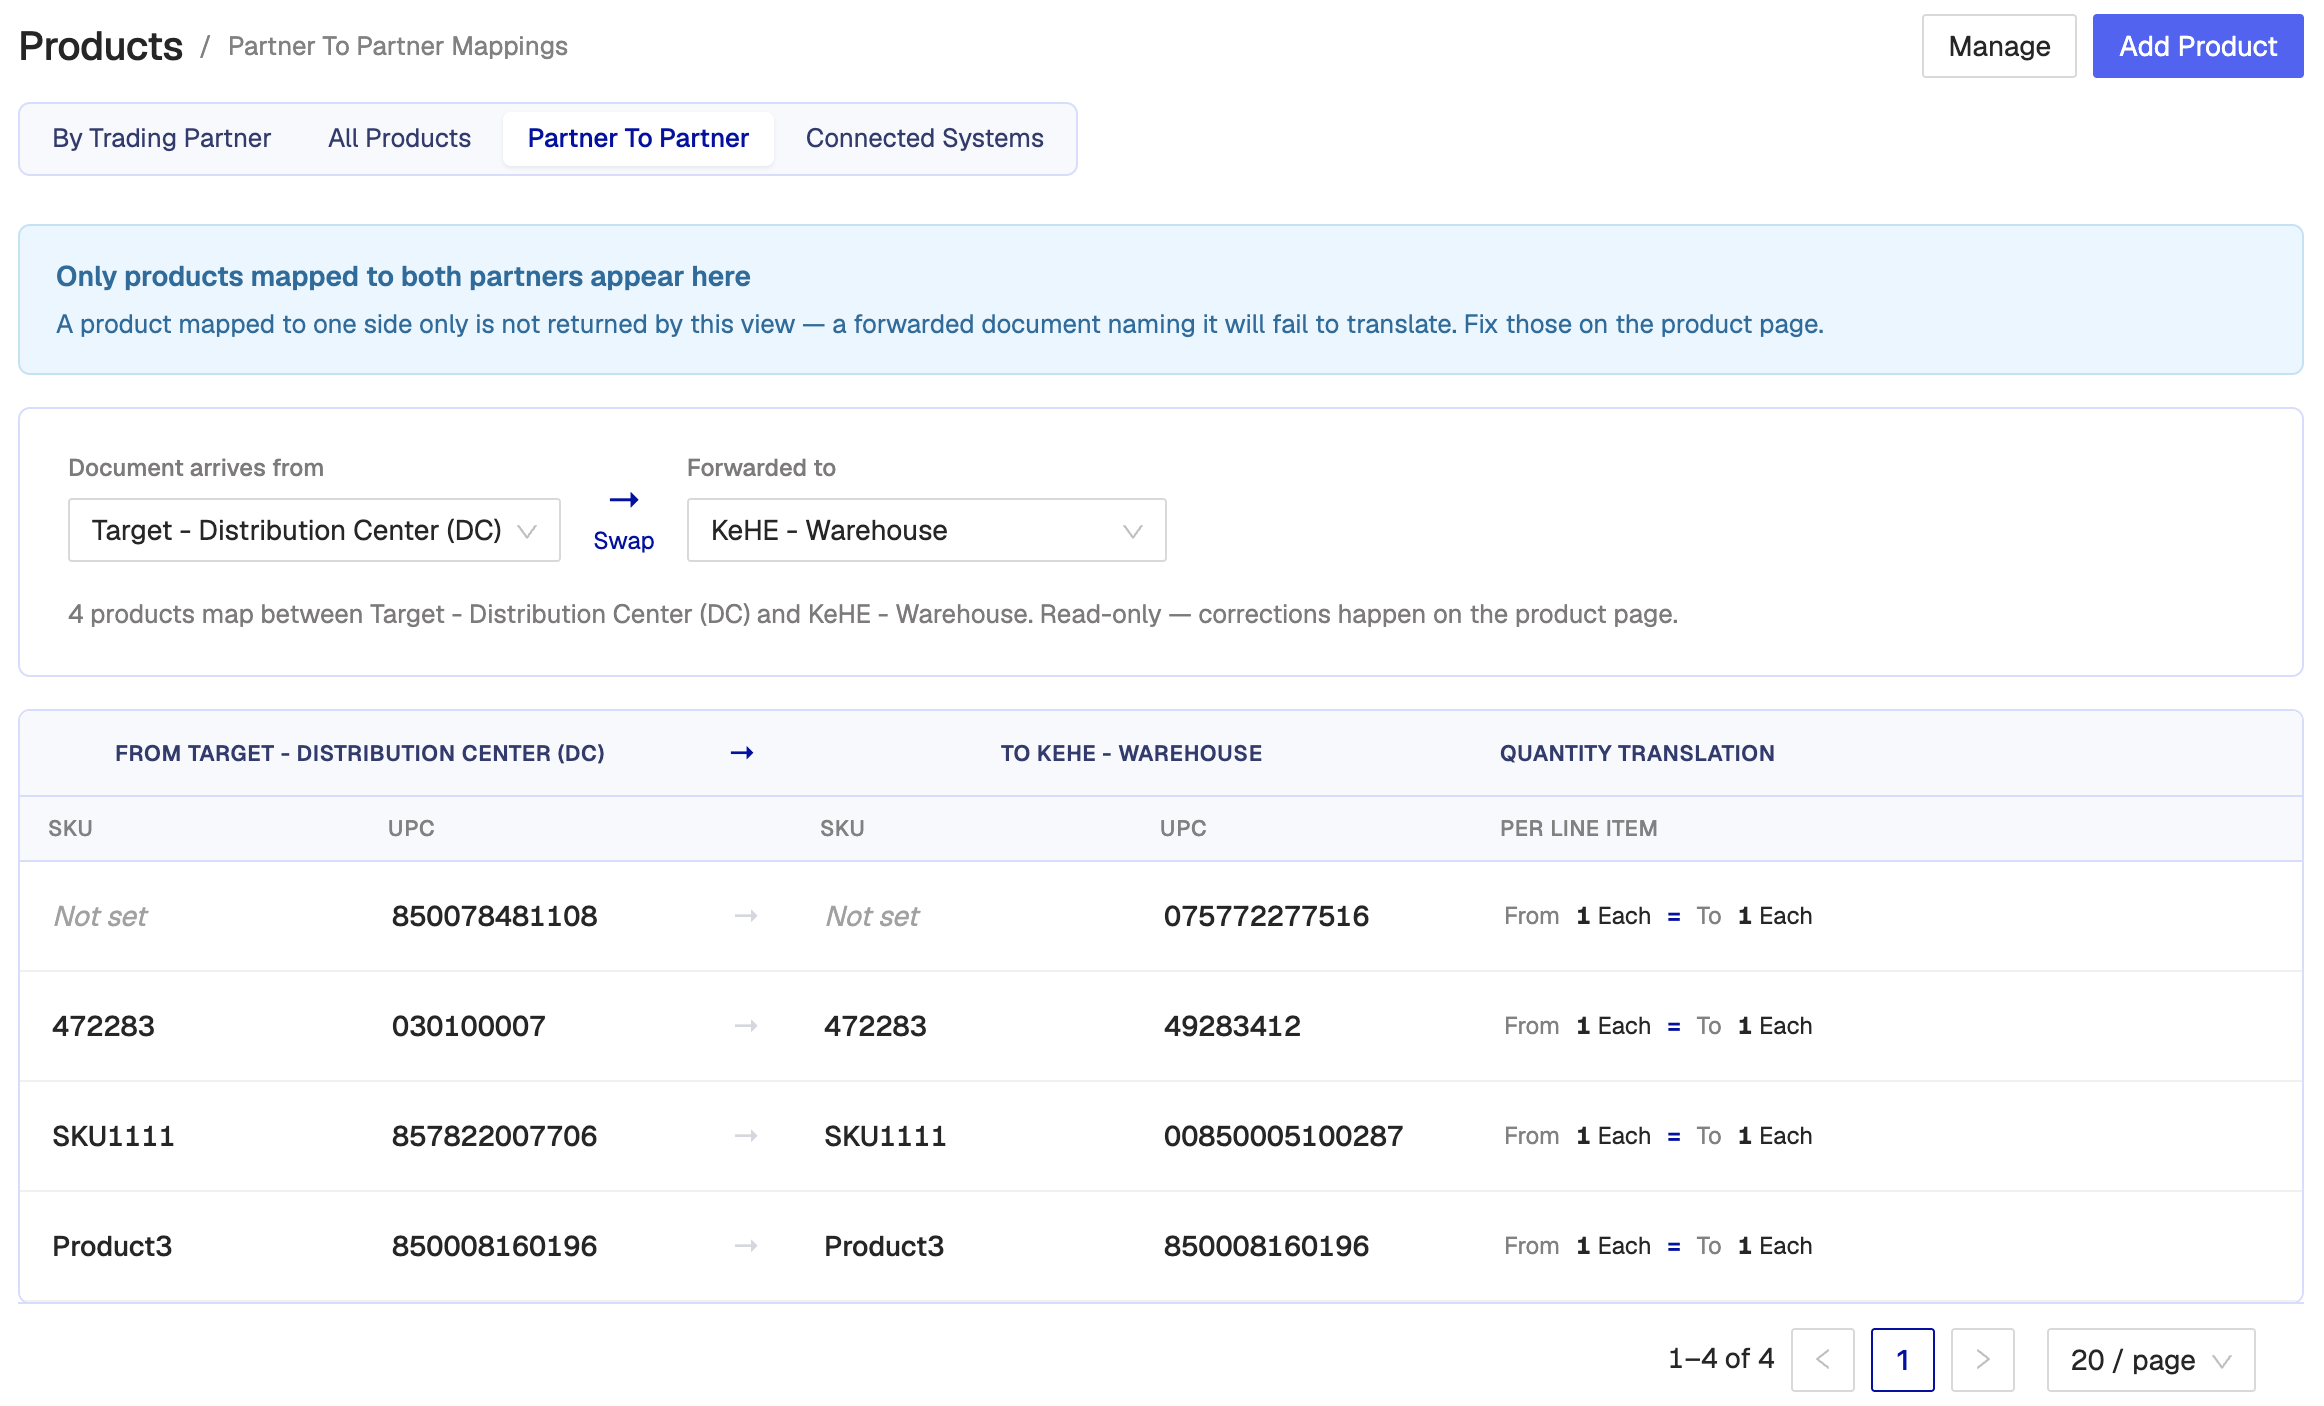
Open Products → Partner To Partner.
Set Document arrives from (source) and Forwarded to (target). Use Swap to reverse them.
The table lists only products that exist on both partners. A product mapped on one side only does not appear. A forwarded document that names that product will fail to translate until you add the missing mapping on the product page.
This view is for checking coverage. Create or fix mappings on the product page, not here.
Adding Products to Your Product Catalog
You can add a product in a few different ways:
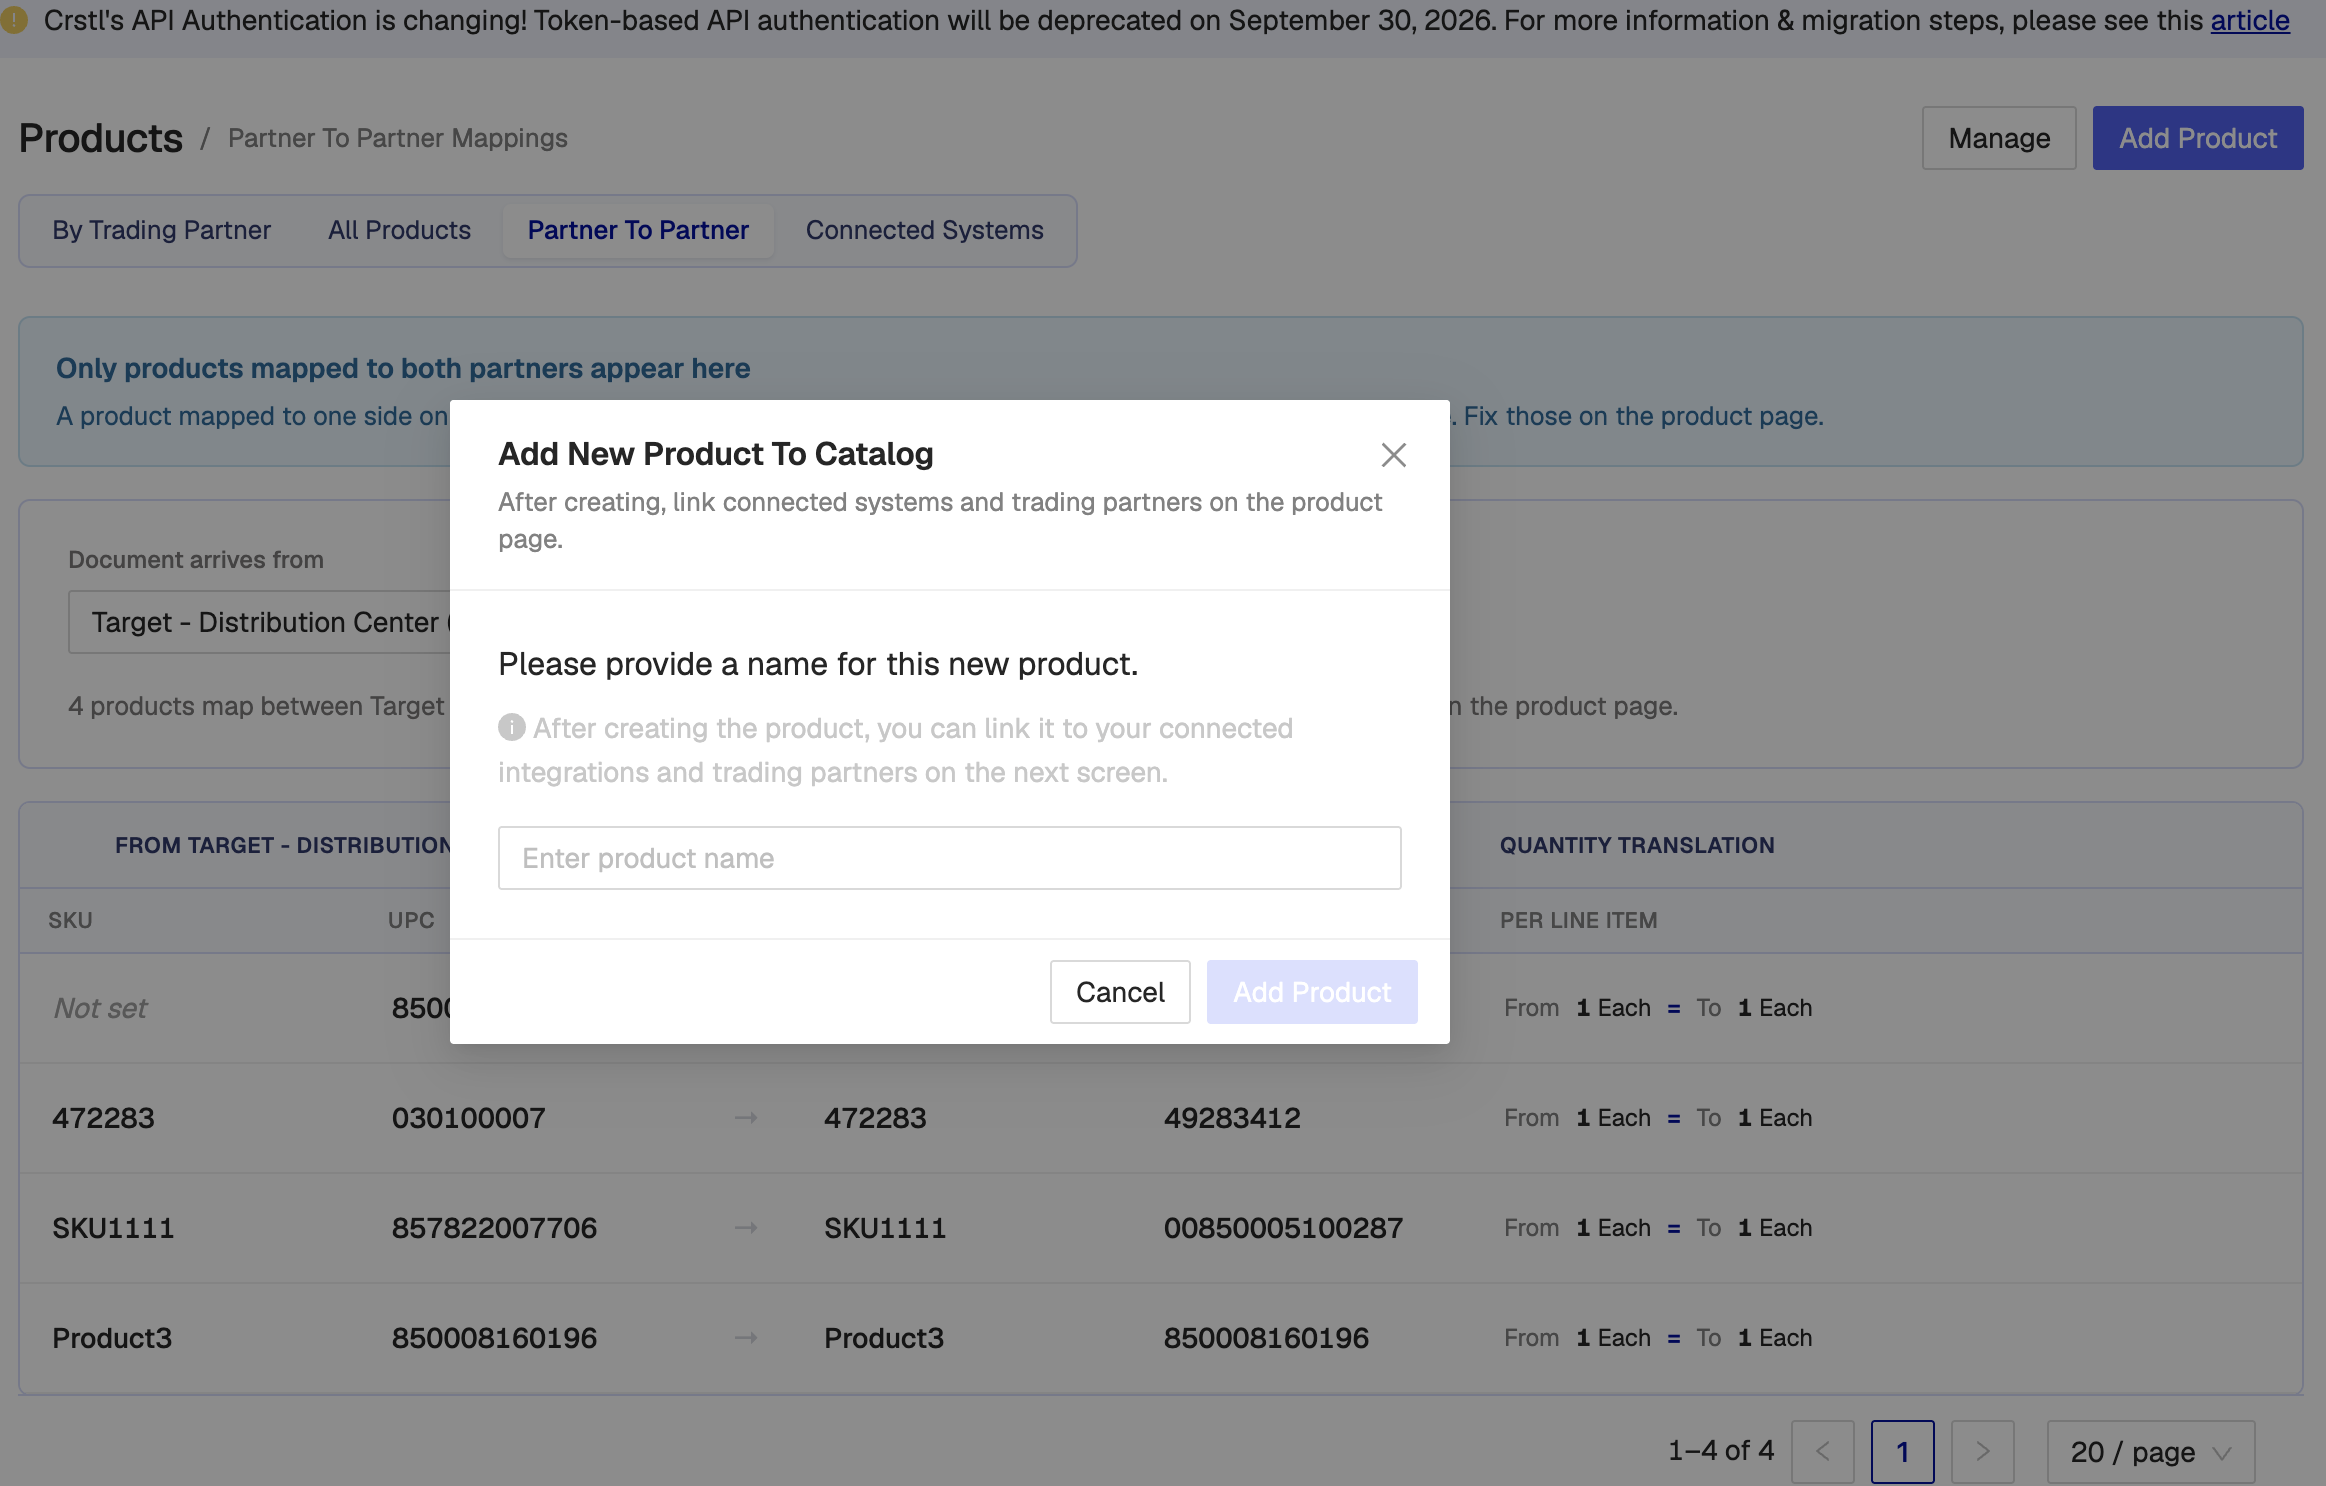
Click Add Product to add one by hand. Enter a name, then click Add Product. You land on the product page with Product details open so you can fill in SKU/UPC and link integrations and trading partners.
Import from a third-party integration. Open Connected Systems, pick the system, find the item, and click Link (see Import a product from a third party integration).
Bulk import from Excel. Open Manage → Bulk upload from a file (see Bulk import / upload product mappings).
Editing a Product
Open a product from All Products (click the name) or from By Trading Partner. The product page has three sections:
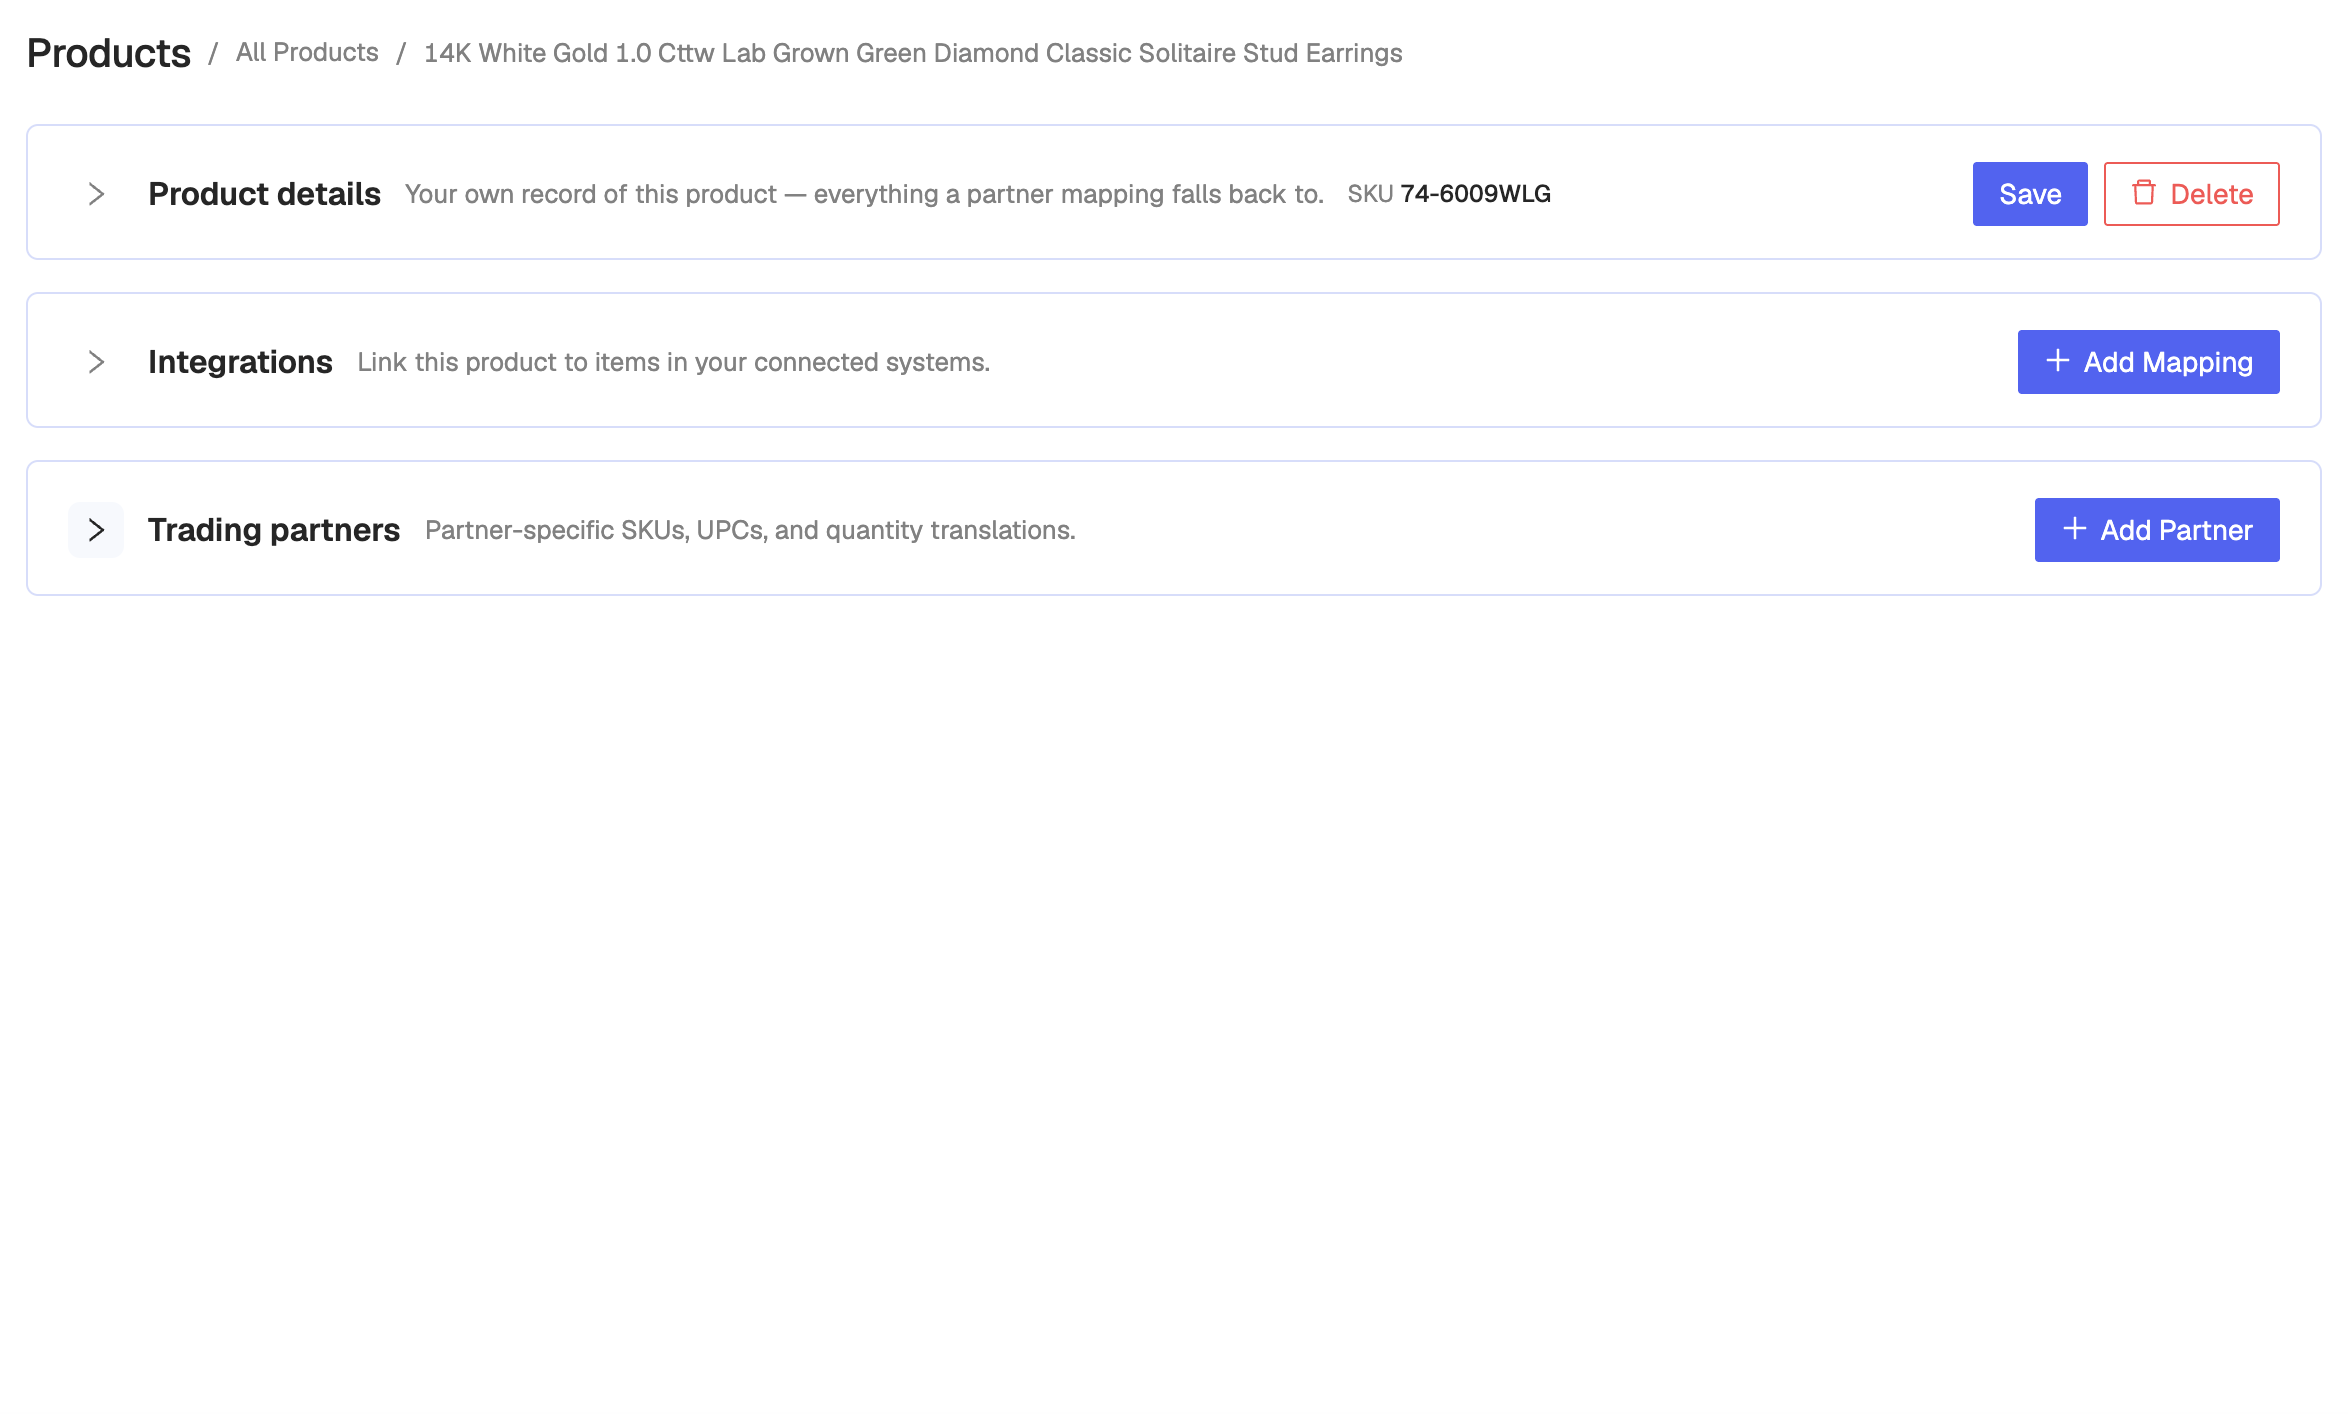
Product details — Your own record (name, default SKU/UPC, weight, dimensions, pack sizes). Partner mappings fall back to these values unless they override them.
Integrations — Map this product to items in connected systems (Shopify, NetSuite, Cin7, and others). Warehouse/3PL EDI partners such as Stord or Hub Group are linked here by SKU/UPC, not under Trading partners.
Trading partners — Retailer-specific SKU/UPC, units, price, and inventory sync.
Each section can be collapsed. Click the arrow next to the section title to expand or hide it.
Updating Product Details
Expand Product details, change the fields you need, and click Save.
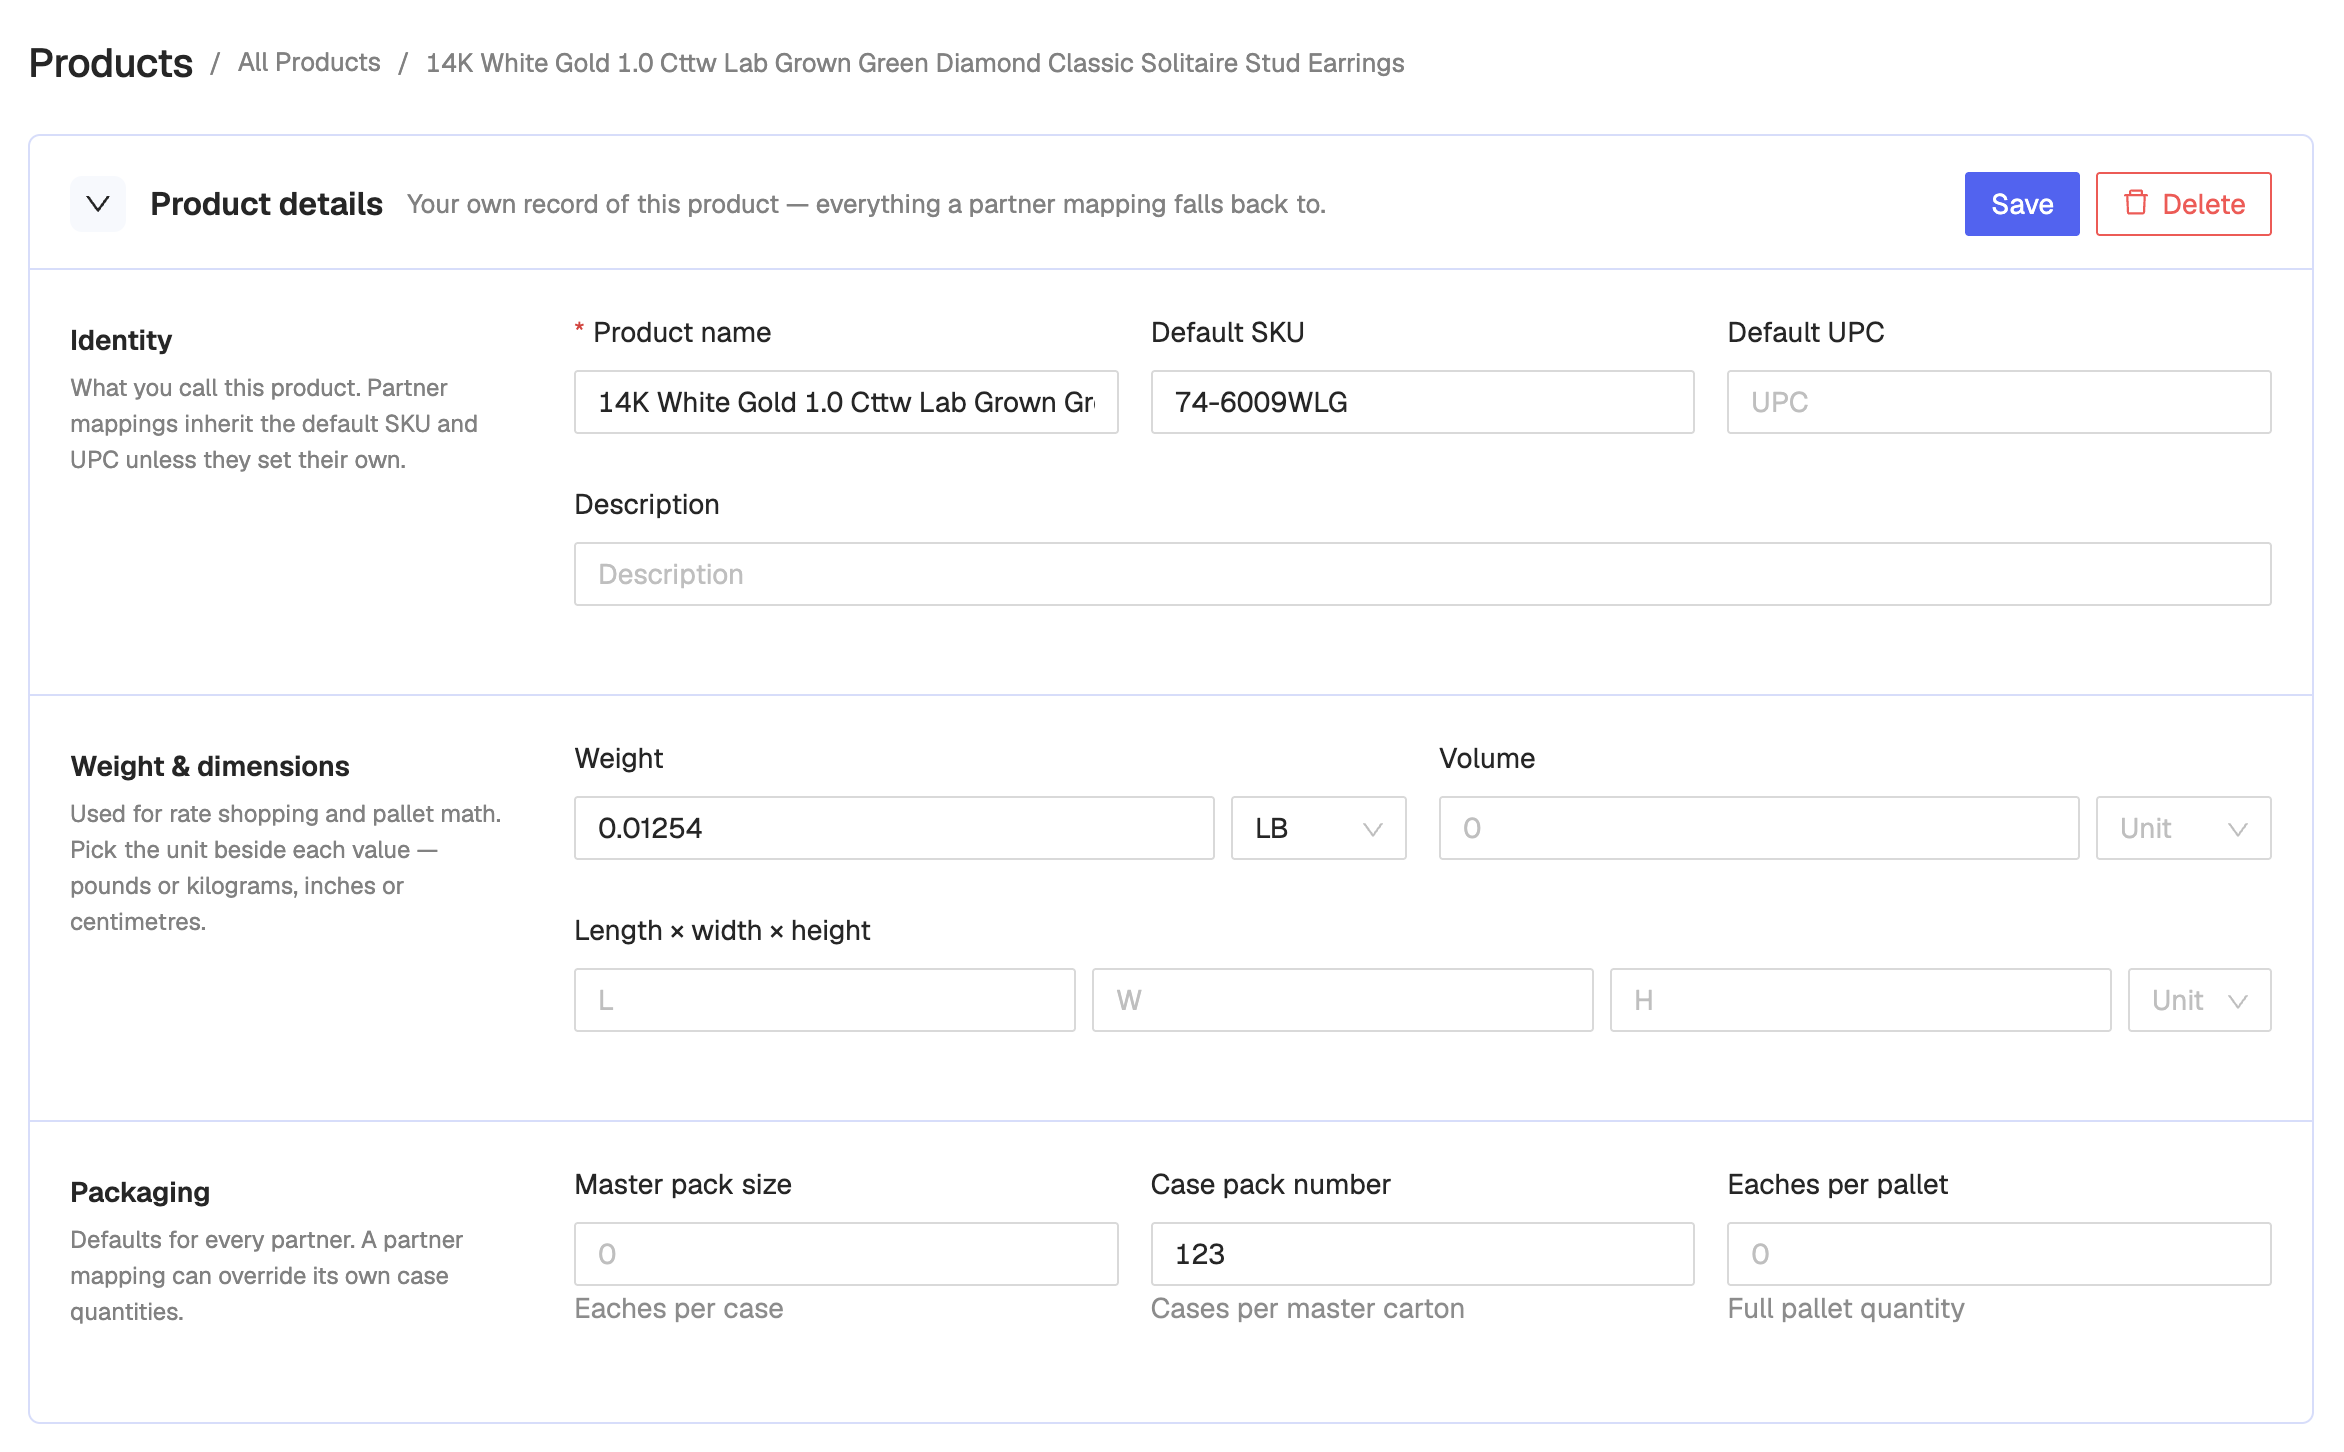
You may only need a field if a trading partner or integration requires it.
Default SKU and UPC — Used to map catalog products to line items on Purchase Orders. A trading partner mapping can override them for that partner only.
Weight — Primarily used to calculate shipment weight for dropship carrier labels. Choose pounds or kilograms next to the value.
Dimensions & Volume — Only required by a small number of trading partners. Leave blank unless required. Choose inches or centimetres for dimensions.
Master pack size — Eaches per case.
Case pack number — Cases per master carton.
Eaches per pallet — In some cases we can calculate pallets from order quantity. Reach out if you need this.
If Save fails because the SKU or UPC is already used, Crstl shows a link to the existing mapping so you can open it and fix the duplicate.
Integration mapping
To sync Purchase Orders to your third-party integrations, map the catalog product to the integration item.
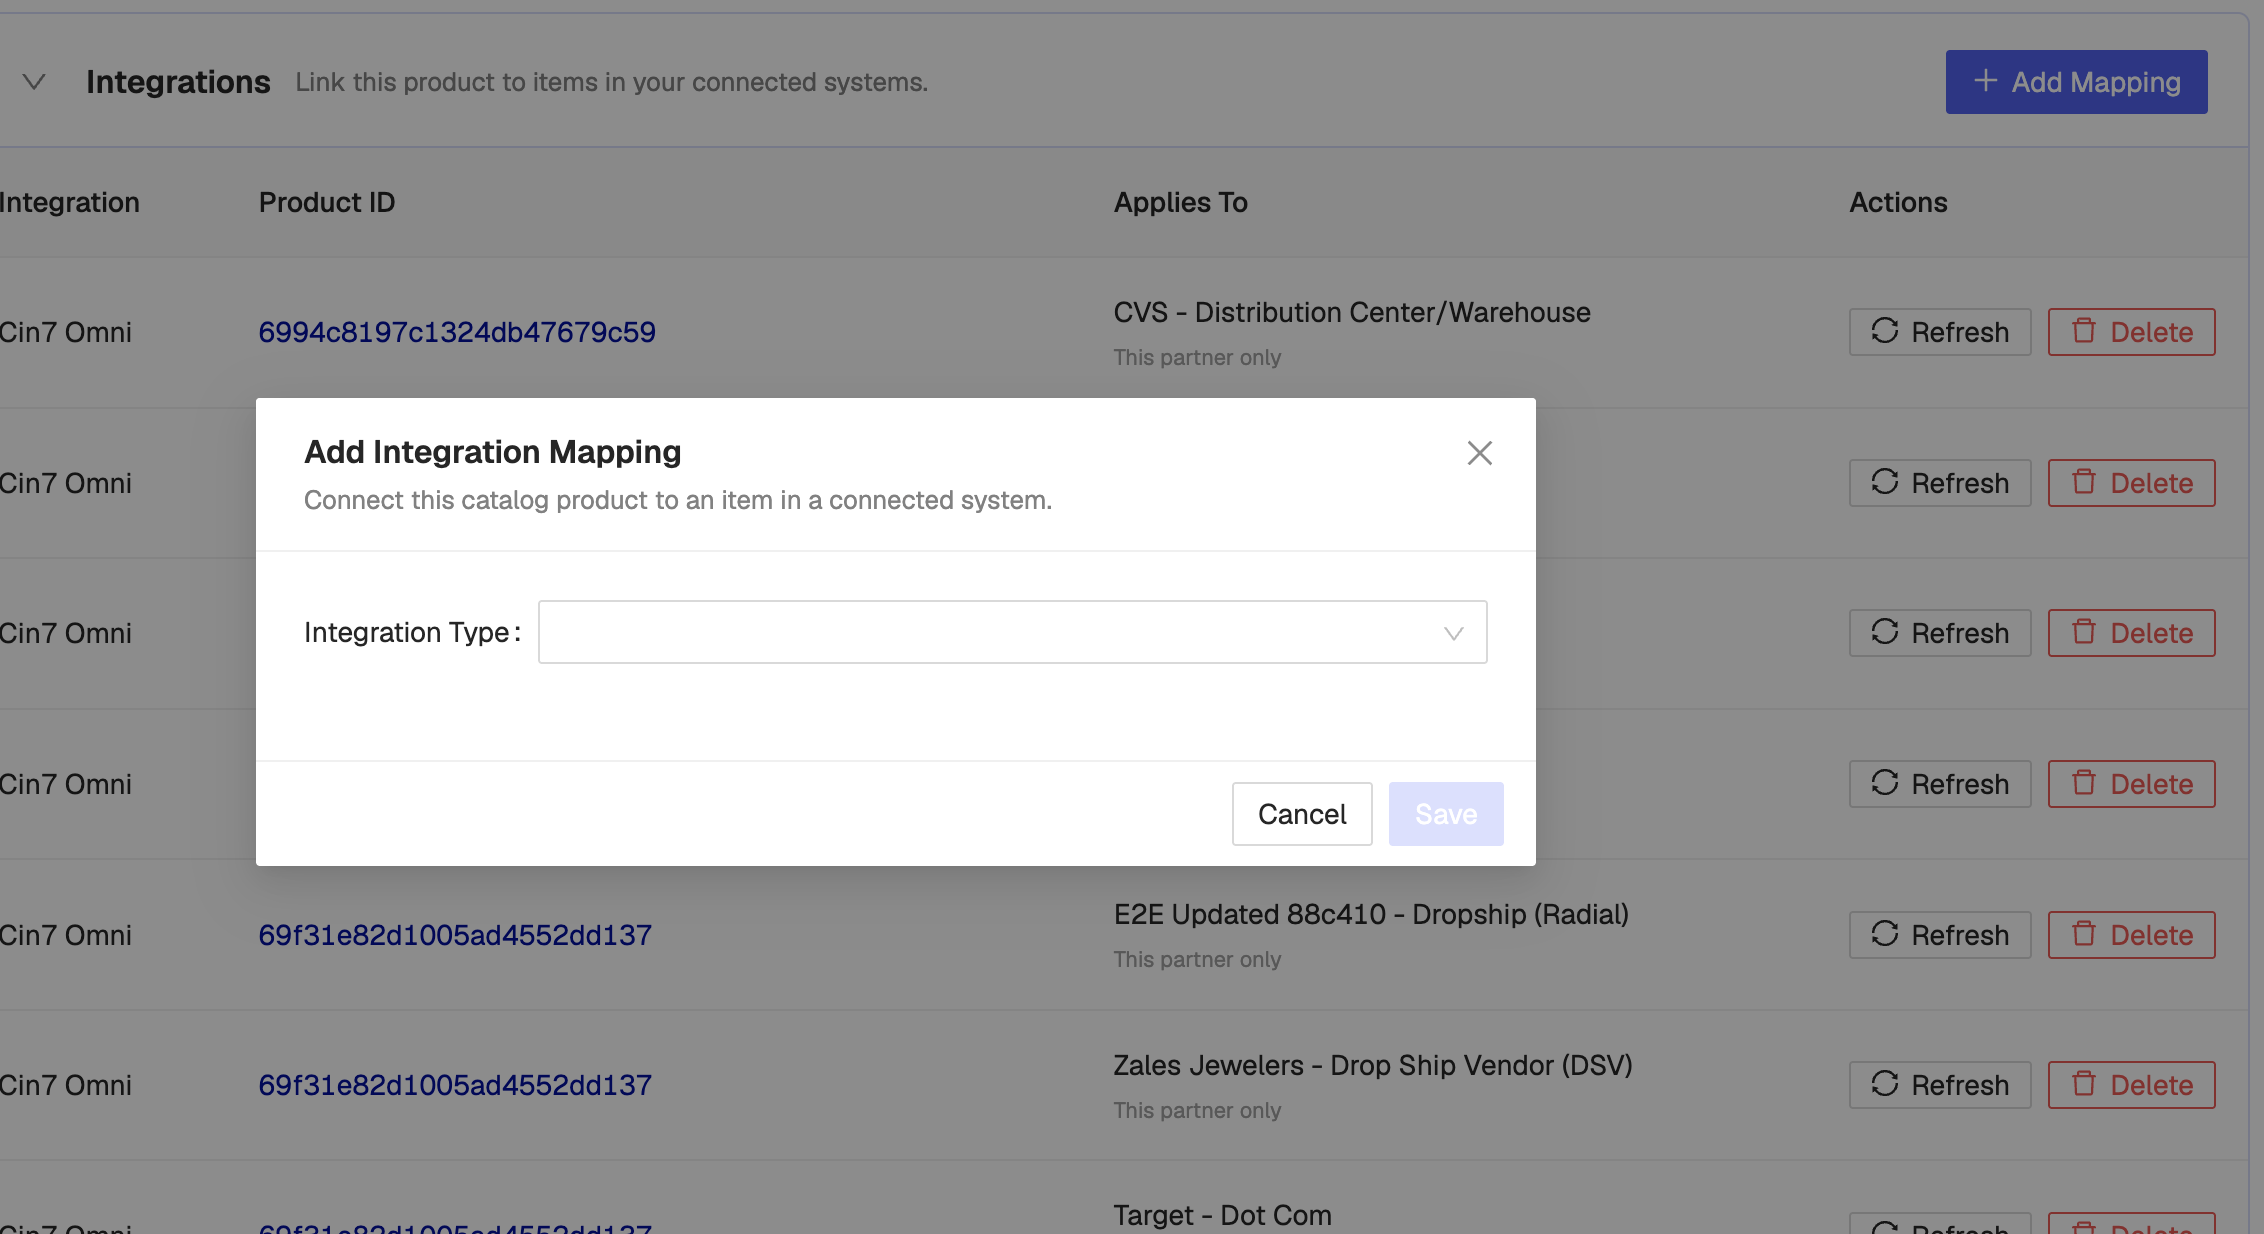
Add an integration mapping
On the product page, open Integrations.
Click Add Mapping.
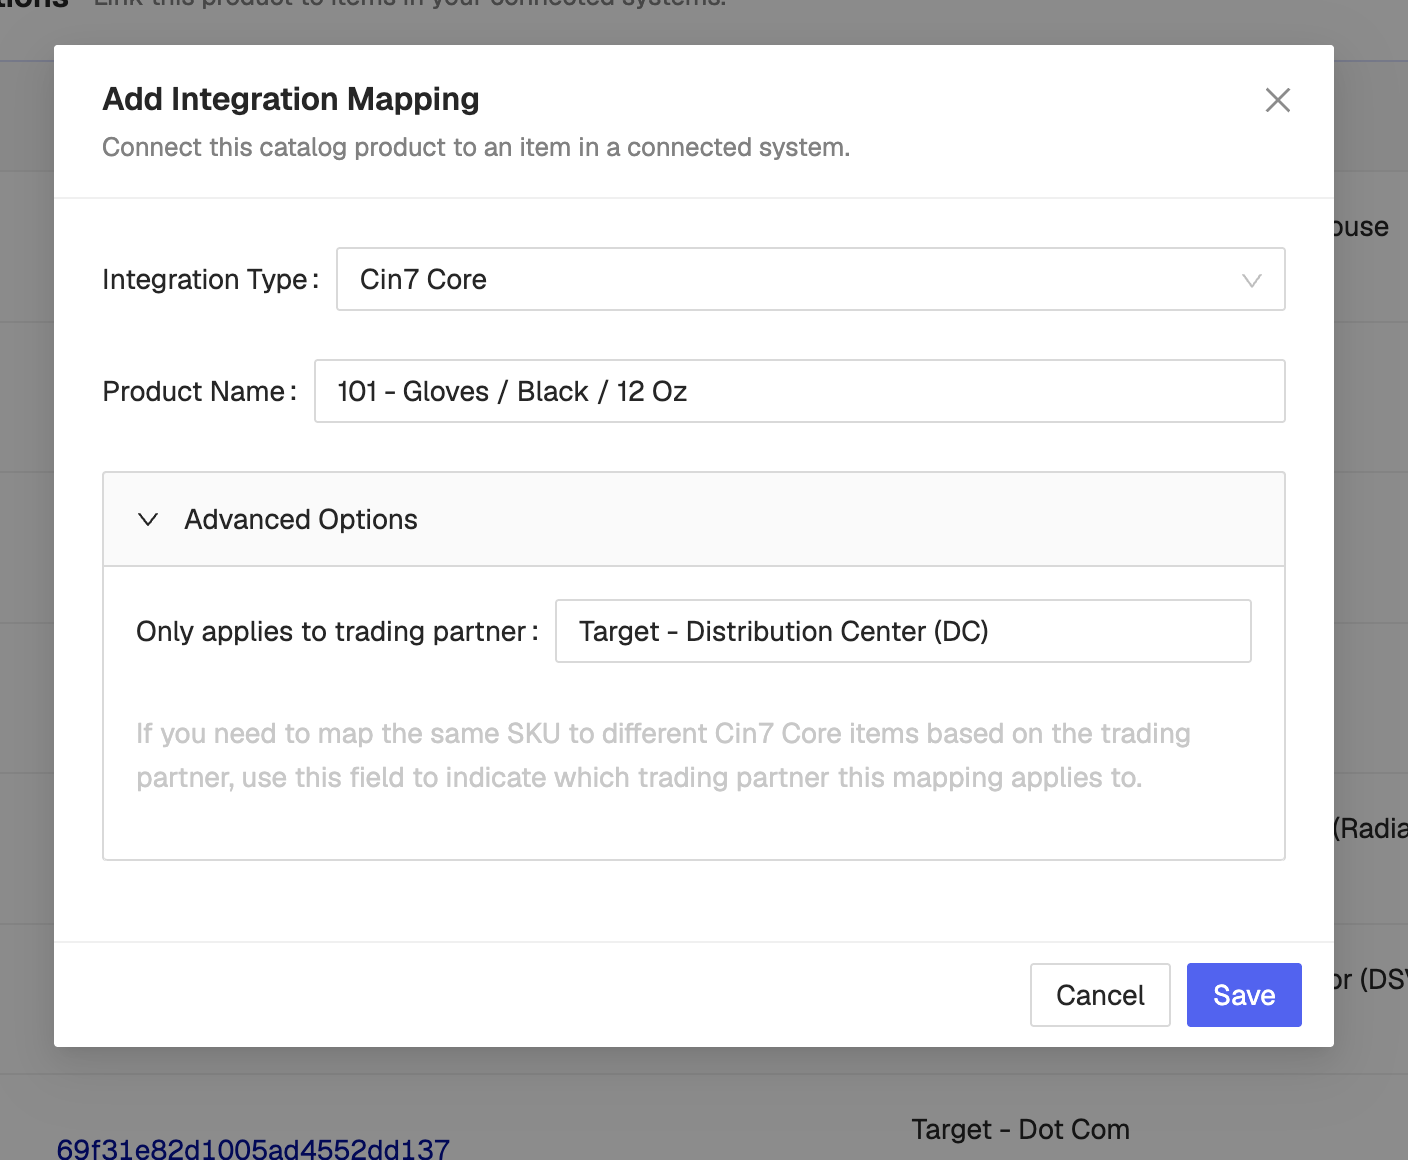
Choose the integration.
Pick the matching item, or enter SKU/UPC for warehouse-style / 3PL EDI integrations.
Choose whether the mapping applies to all trading partners or one partner.
Click Save.
After the mapping exists
To pull the latest item data, use refresh on that row.
To remove the link, delete it from the Integrations table.
To link another unmapped system, use Add Mapping here or on By Trading Partner.
Trading Partner mapping
Use this for retailer-specific information about an item.
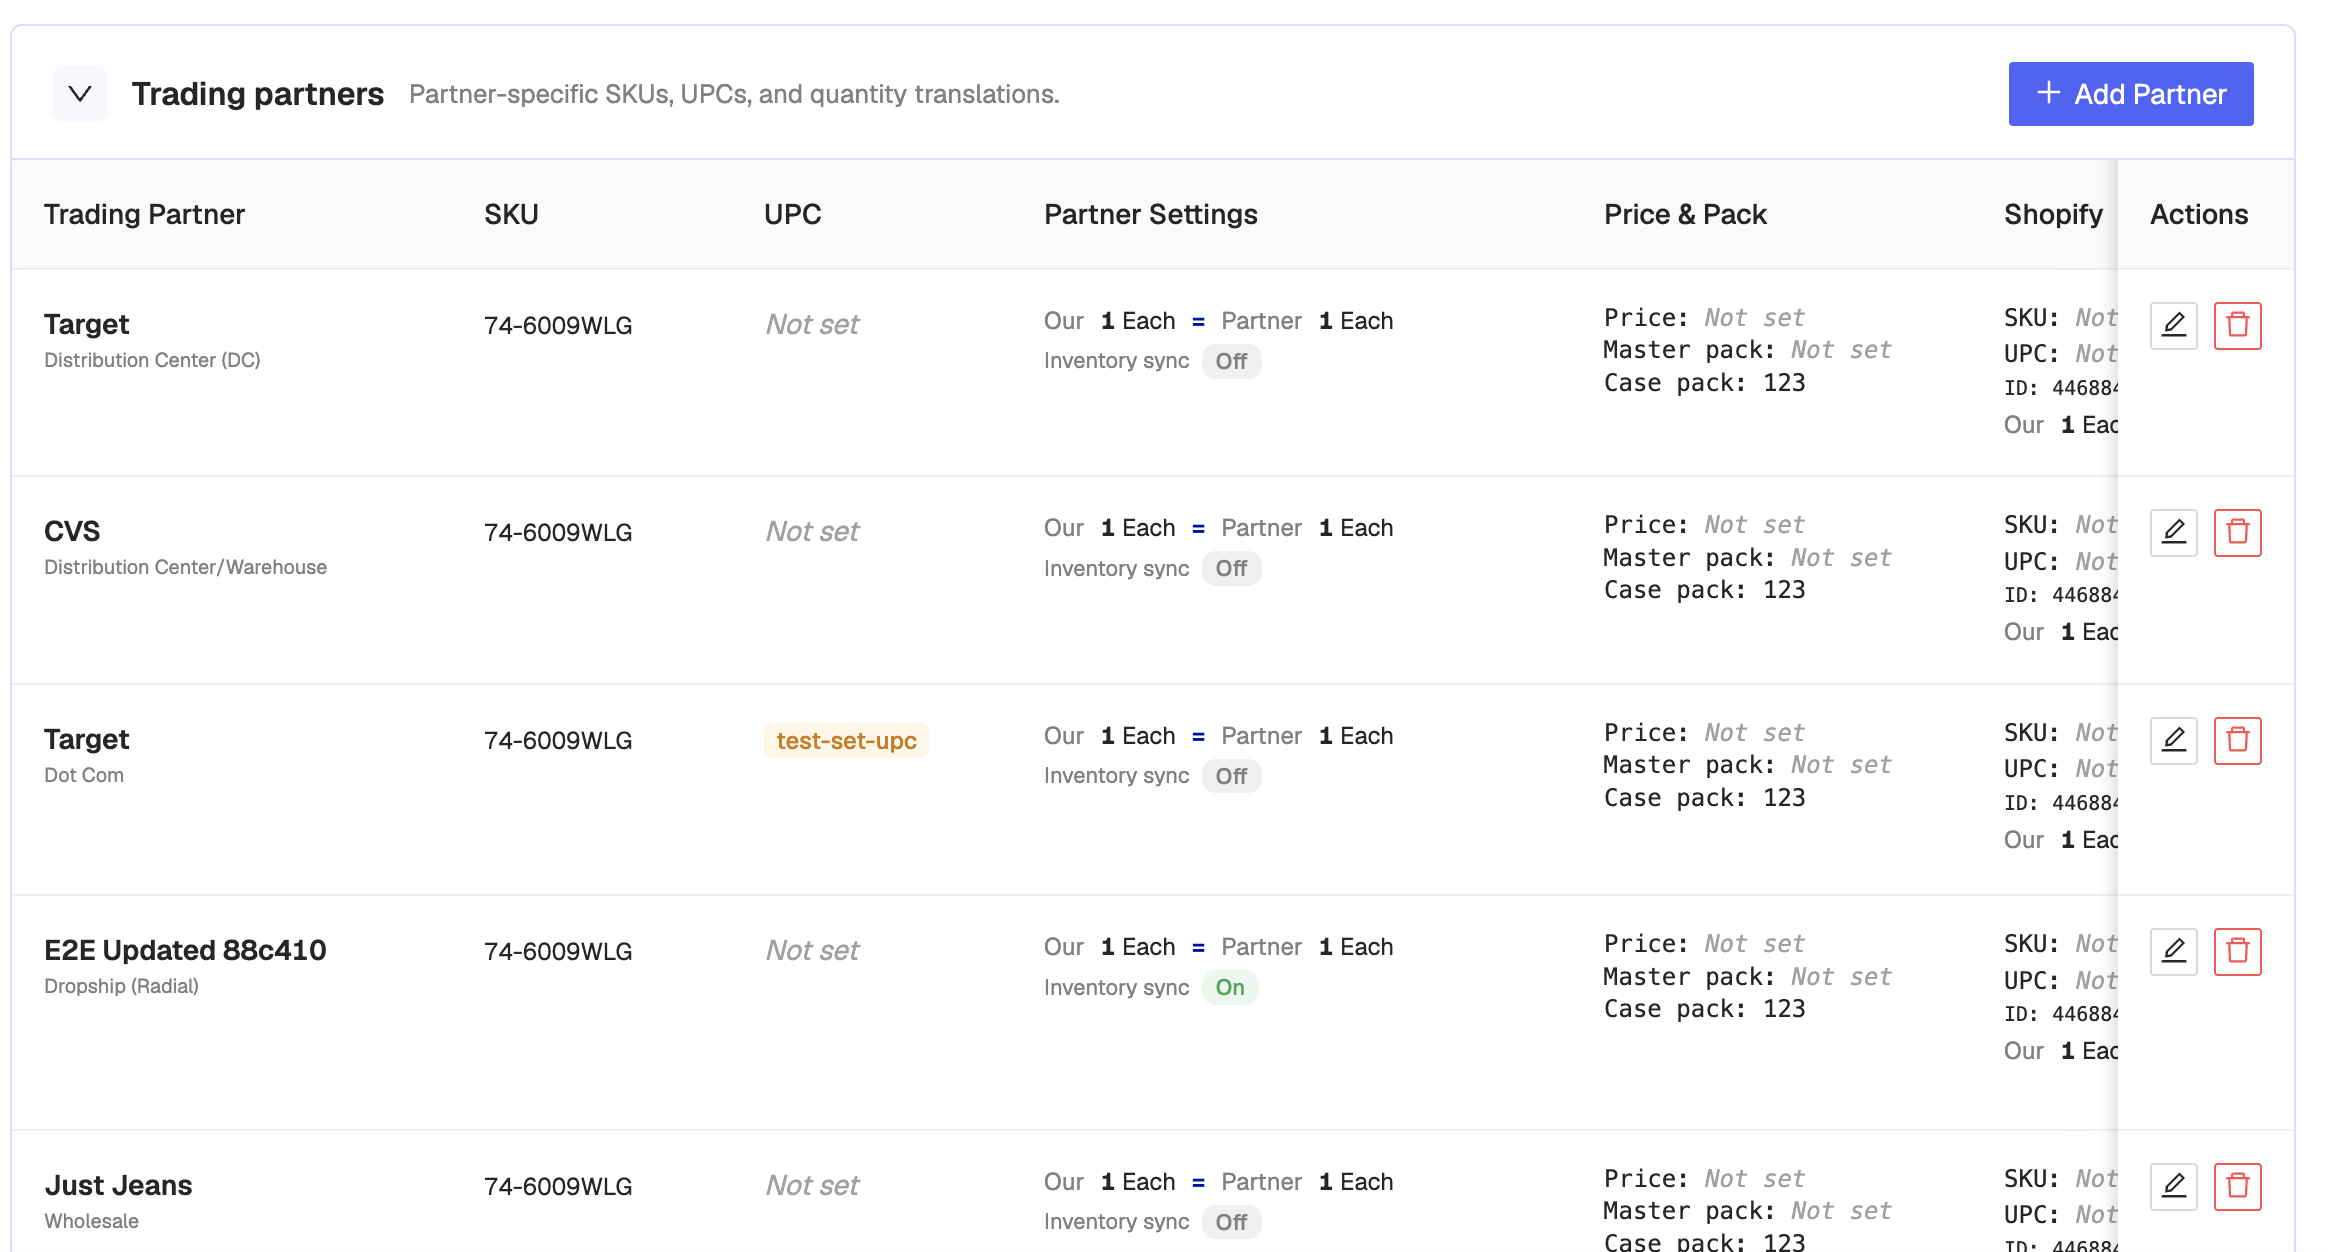
Adding a Trading Partner
On the product page, open Trading partners.
Click Add Partner.
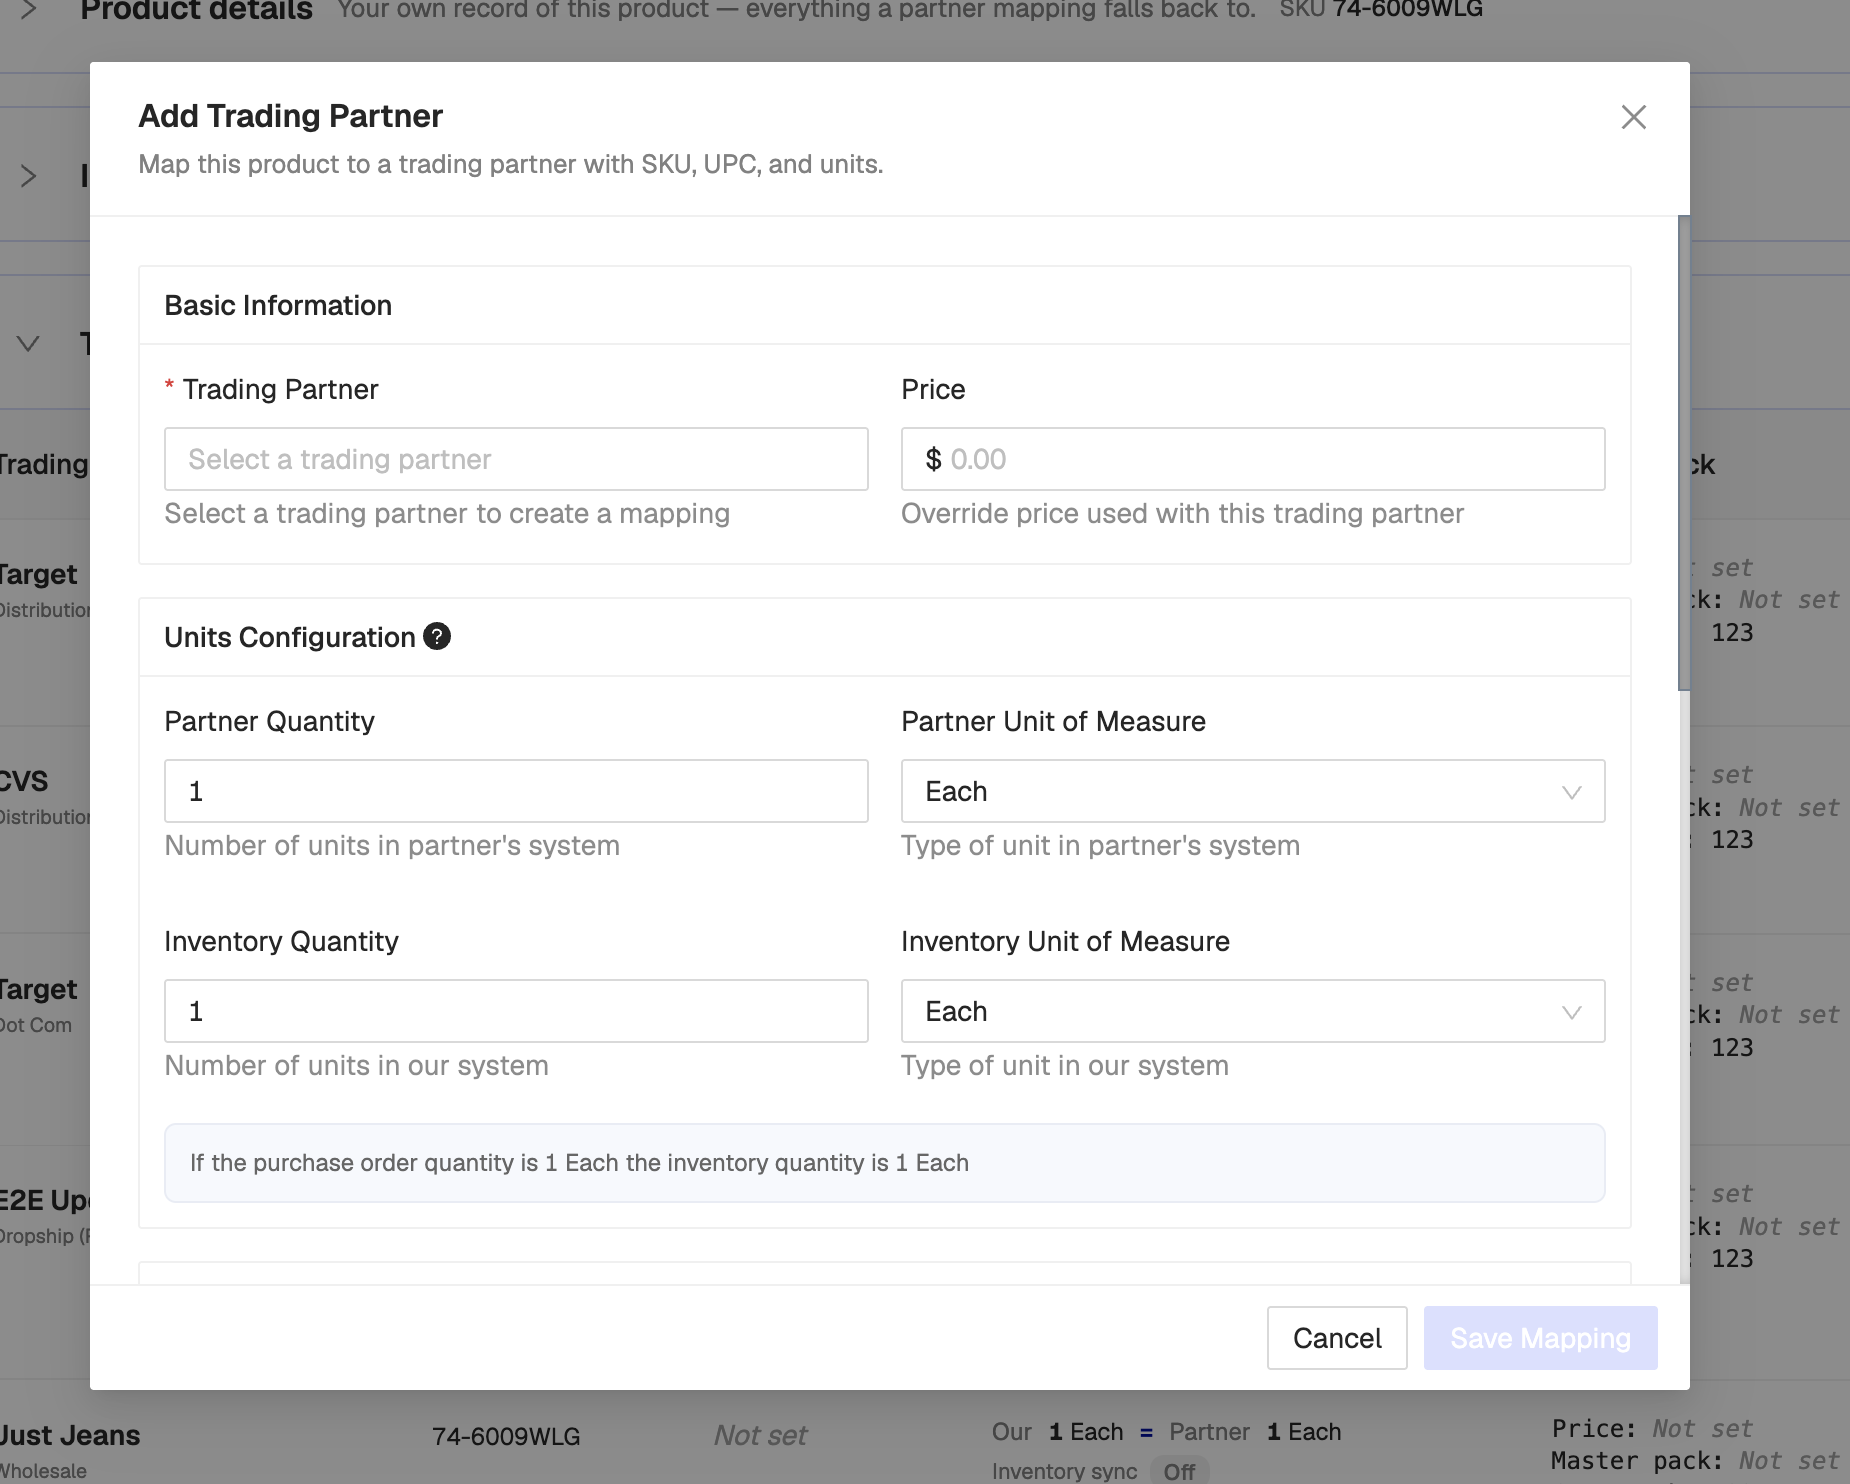
Select the trading partner.
Set unit conversions between EDI quantities and your integration quantities. Helper text looks like: “If the purchase order quantity is 1 Case the inventory quantity is 12 Each.”
Optionally override SKU and UPC for that partner only.
Optionally set price, master pack size, and case pack.
Turn on Sync Inventory if this item should be included on EDI 846 Inventory Advice (typical for drop shipping).
If you use Cin7 Core, set location and tax rules at the bottom of the form (see Cin7 Core special fields).
If a linked system needs different units than the partner default, set integration overrides.
Click Save.
Unit conversion
When Crstl pushes an EDI document to an integration (or the reverse), it uses Partner Quantity / Partner UOM and Inventory Quantity / Inventory UOM.
Example: Partner Quantity 1 Case, Inventory Quantity 6 Each.
EDI → integration: (qty in EDI) × (inventory qty) / (partner qty)
2 cases → 12 Eaches.
Integration → EDI: (qty in integration) × (partner qty) / (inventory qty)
18 eaches → 3 cases.